1. Кіріспе
This manual provides detailed instructions for the installation, operation, and maintenance of your JOOAN 4G Solar Security Camera. This outdoor wireless surveillance camera is designed for areas without traditional power or network infrastructure, utilizing 4G cellular connectivity and solar power for continuous operation. Please read this manual thoroughly before use to ensure proper setup and functionality.

Image 1.1: JOOAN 4G Solar Security Camera with its solar panel and a smartphone displaying the camera's live feed, highlighting its 4MP/5MP HD resolution capability.
2. Өнімнің ерекшеліктері
- 4G қосылу мүмкіндігі: Operates independently using a SIM card, ideal for remote locations.
- Күннен қуат алатын: Equipped with a solar panel for continuous charging, reducing the need for external power sources.
- High Definition Resolution: Таза бейне түсіредіtage for effective surveillance.
- Түсті түнгі көру: Offers multiple night vision modes including infrared, full-color, and smart color night vision for enhanced visibility in low-light conditions up to 10 meters.
- Жергілікті және бұлтты сақтау: Supports up to 256GB SD card storage and optional cloud storage for recorded footage.
- Оңай орнату: Designed for straightforward setup and mounting.
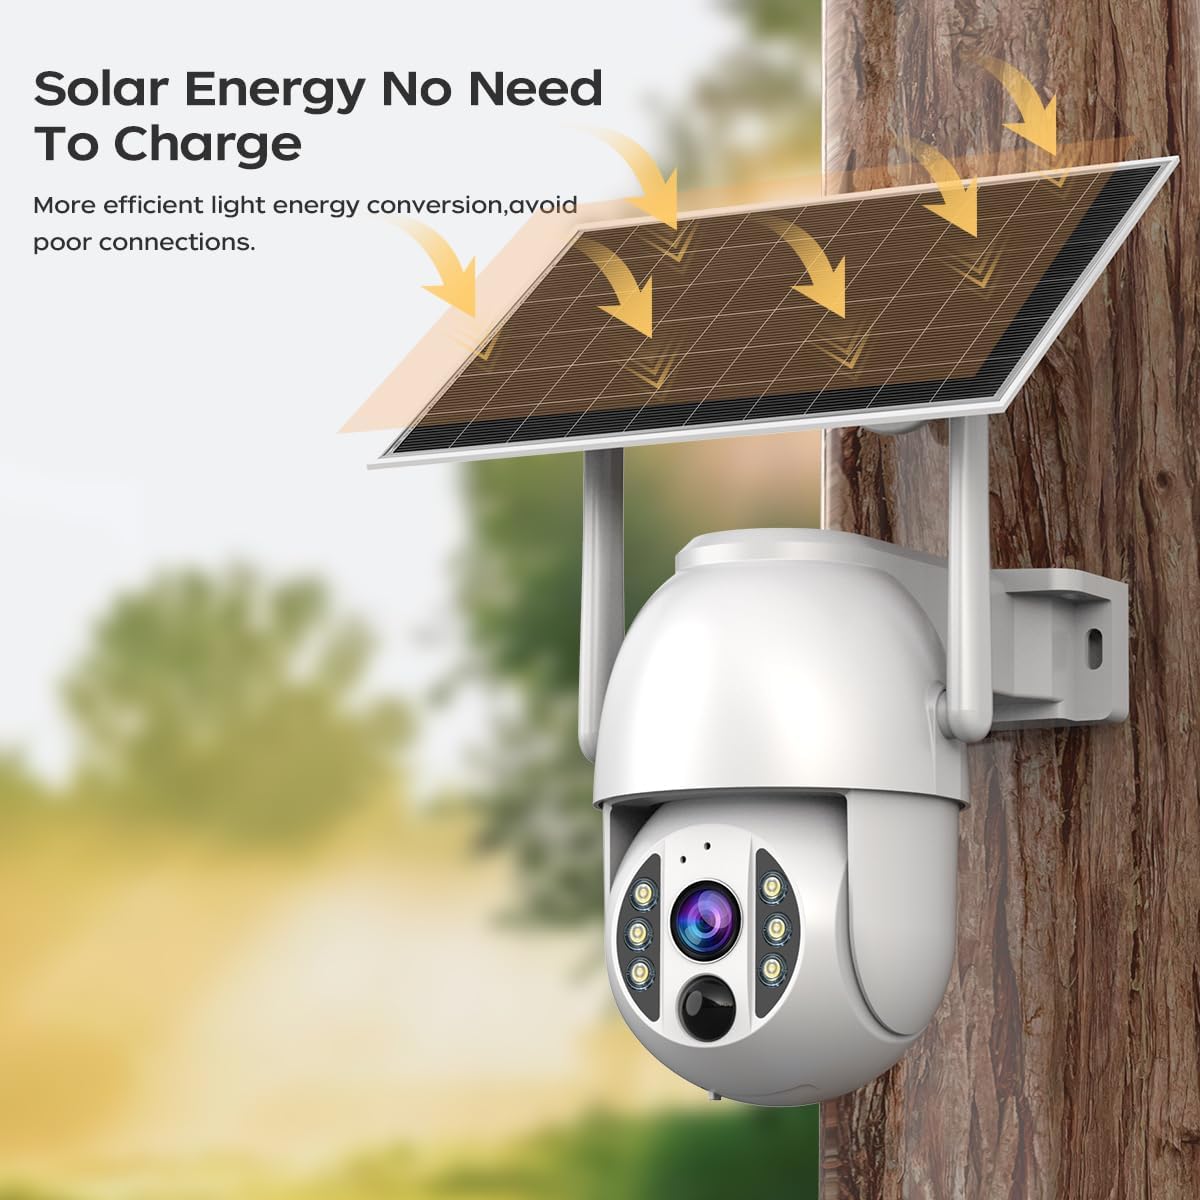
Image 2.1: The JOOAN 4G Solar Security Camera mounted with its solar panel, illustrating its solar energy capability for efficient light energy conversion and avoiding poor connections.
3. Орнату және орнату
3.1. SIM картасы мен SD картасын орнату
Before mounting, install a 4G SIM card (not included) and an SD card (up to 256GB, not included) into the designated slots on the camera. Ensure the camera is powered off before inserting or removing cards.

Кескін 3.1: Жақын планда view of the JOOAN camera's SD card slot, indicating support for cloud storage and a maximum 256GB SD card.
3.2. Орнату қадамдары
- Positioning and Punching: Select a suitable location for the camera and solar panel. Mark the drilling points on the wall. Use a drill to create holes at the marked positions.
- Кеңейту бұрандаларын салыңыз: Gently tap the expansion screws into the drilled holes until they are flush with the surface.
- Камераны орнату: Align the camera bracket with the expansion screws and secure it using the provided screws.
- Толық орнату: Attach the solar panel to the camera bracket or mount it separately in a location with ample sunlight. Ensure all connections are secure.

Image 3.2: Visual guide showing the four installation steps: 1. Positioning and punching, 2. Inserting expansion screws, 3. Mounting the camera with screws, and 4. Completing the installation with the solar panel.
3.3. Қолданба қосылымы
Download the official JOOAN app from your smartphone's app store. Follow the in-app instructions to add your camera. There are typically two methods:
- Add APP Phone Code: Scan the QR code displayed on your mobile phone APP with the camera lens from a distance of 20-30cm to add the distribution network.
- Add Camera Body Code: Scan the QR code located on the camera body using the mobile phone APP to add the distribution network.

Image 3.3: Illustration of the two connection methods: scanning the APP phone code or scanning the camera body code to establish a network connection.
4. Операция
4.1. Қосу / Өшіру
The camera automatically powers on when sufficient solar power is available or when connected to a power source. To power off, disconnect the power source and allow the battery to deplete, or use the app if a power-off function is available.
4.2. Тікелей эфир View және Жазу
Once connected to the app, you can access the live video feed. The camera supports continuous recording to the SD card or cloud storage (subscription may be required). You can also manually record video or capture screenshots from the live view.
4.3. Қозғалысты анықтау және ескертулер
Configure motion detection sensitivity and alert settings within the app. The camera will send notifications to your smartphone when motion is detected. Recorded events can be reviewed in the app's playback section.
4.4. Түнгі көру режимдері
The camera offers three night vision modes, selectable via the app:
- Инфрақызыл түнгі көру: Толық қараңғылықта анық қара және ақ кескіндерді береді.
- Толық түсті түнгі көру: Utilizes built-in spotlights to provide color images in low-light conditions.
- Ақылды түсті түнгі көру: Automatically switches from infrared to full-color vision upon detection of motion or specific events.

Image 4.1: Comparison of the three night vision modes: Infrared night vision, Full color night vision, and Smart color night vision, demonstrating the camera's ability to pick out details in darkness up to 10 meters away.
5. Техникалық қызмет көрсету
- Линзаны тазалау: Кескіннің таза сапасын қамтамасыз ету үшін камера линзасын жұмсақ, құрғақ шүберекпен үнемі тазалаңыз. Абразивті тазартқыштардан аулақ болыңыз.
- Күн панелін тазалау: Keep the solar panel free from dust, dirt, and debris to maximize charging efficiency. Clean with a damp қажетінше мата.
- Микробағдарламаны жаңарту: Check the app periodically for available firmware updates to ensure optimal performance and security.
- Батарея денсаулығы: Ensure the solar panel receives adequate sunlight to maintain battery charge. Prolonged periods without sunlight may require temporary charging via a USB power adapter (not included).
6. Ақаулықтарды жою
6.1. Camera Not Connecting to 4G Network
- SIM картасының дұрыс салынғанына және жарамды деректер жоспарымен белсендірілгеніне көз жеткізіңіз.
- Check 4G signal strength at the camera's location.
- Restart the camera by briefly disconnecting and reconnecting its power.
6.2. No Video Feed or Poor Quality
- Verify the camera has sufficient power.
- Check the 4G signal strength.
- Камера объективін тазалаңыз.
6.3. Күн панелі зарядталмай жатыр
- Ensure the solar panel is positioned to receive direct sunlight for several hours daily.
- Clean any dirt or obstructions from the solar panel surface.
- Күн батареясы мен камера арасындағы қосылым кабелін тексеріңіз.
6.4. SD Card Not Recording
- Ensure the SD card is correctly inserted and formatted within the app.
- Check if the SD card has sufficient free space.
- Қолданбадағы жазу параметрлерін тексеріңіз.
7. Техникалық сипаттамалар
| Ерекшелік | Мәлімет |
|---|---|
| Бренд | ЖАУАН |
| Үлгі | B0GCFGYCLX |
| Қуат көзі | Күннен қуат алады |
| Қосылу протоколы | 4G Cellular (SIM card required), Wi-Fi (for initial setup/local access if applicable) |
| Ұсынылатын пайдаланулар | Indoor/Outdoor Surveillance |
| Арнайы мүмкіндік | Орнату оңай |
| Сақтау | Supports up to 256GB SD card, Cloud Storage (subscription may apply) |
8. Кепілдік және қолдау
For warranty information and technical support, please refer to the JOOAN official webсайтына өтіңіз немесе тұтынушыларға тікелей хабарласыңыз. Сатып алуды растау ретінде сатып алу түбіртегіңізді сақтаңыз.
Қосымша көмек алу үшін мына сайтқа кіріңіз: JOOAN Store on Amazon