1. Кіріспе
This manual provides detailed instructions for the installation, operation, and maintenance of the Generic Refrigerator Ice Maker Dispenser Auger Replacement, part number WR17X11705DH468. This component is designed to restore proper ice dispensing functionality in compatible GE refrigerator models.
2. Үйлесімділік
This ice maker dispenser auger is compatible with various GE refrigerator models, including but not limited to:
- GSE22KEWNFBB, GSE22KEWNFSS, GSE22KEWNFWW
- GSE22KEWPFBB, GSE22KEWPFSS, GSE22KEWPFWW
- GSE25KETAFBB, GSE25KETAFWW
- GSE25KETBFBB, GSE25KETBFWW
- GSE25KETCFBB, GSE25KETCFWW
- GSE25KETGFBB, GSE25KETGFWW
- GSE25KETHFBB, GSE25KETHFWW
- GSE25KETJFBB, GSE25KETJFWW
- GSE25KETNFBB, GSE25KETNFWW
- GSF25IGXBBB, GSF25IGXBWW
- GSF25IGXJBB, GSF25IGXJWW
- GSF25IGXLBB, GSF25IGXLWW
- GSF25IGXNBB, GSF25IGXNWW
- GSF25IGXPBB, GSF25IGXPWW
- GSF25IGZBBB, GSF25IGZBWW, GSF25IGZCBB, GSF25IGZCWW
Please verify your refrigerator's model number before proceeding with installation.
3. Өнім аяқталдыview
The ice maker dispenser auger is a crucial component responsible for moving ice from the ice bucket to the dispenser chute. This replacement part features a durable plastic spiral blade with a threaded metal rod core, designed to meet or exceed original equipment manufacturer (OEM) quality standards.
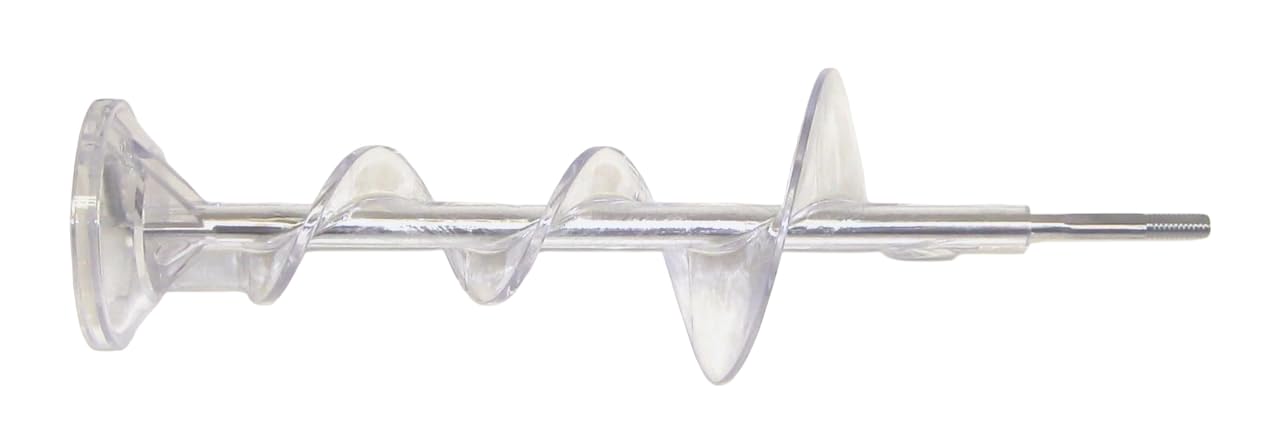
Figure 1: Complete Ice Maker Dispenser Auger. This image shows the full length of the clear plastic auger, highlighting its spiral design and the integrated metal rod.
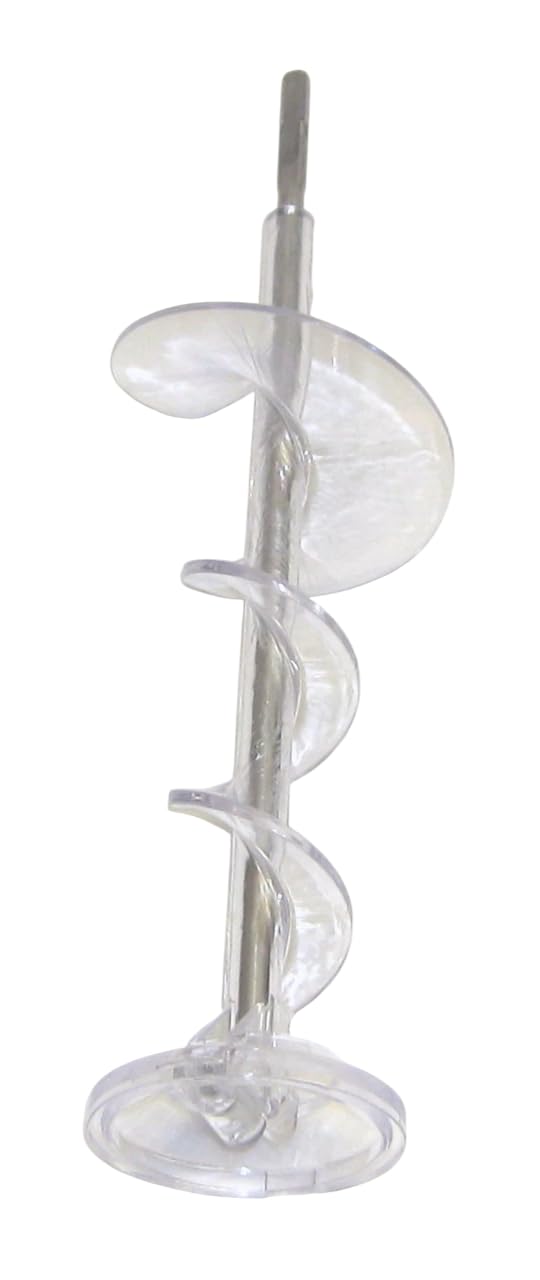
Figure 2: Vertical view of the auger. This perspective emphasizes the spiral structure of the plastic blades and the connection point at the top, which engages with the motor.

Figure 3: Threaded metal rod end. A detailed view of the metal rod's threaded tip, which secures the auger within the ice bucket assembly.
4. Қауіпсіздік туралы ақпарат
Before attempting any repair, always prioritize safety. Failure to follow these safety guidelines may result in personal injury or damage to your appliance.
- Қуатты ажырату: Always unplug the refrigerator from the electrical outlet before beginning any repair or maintenance.
- Қорғаныс құралдарын киіңіз: Use appropriate personal protective equipment, such as gloves, to prevent cuts or scrapes.
- Мұқият ұстаңыз: The ice maker assembly may contain sharp edges or delicate components.
- Маманмен кеңесіңіз: If you are unsure about any step or uncomfortable performing the repair, contact a qualified appliance technician.
5. Қажетті құралдар
The following tools may be helpful for the installation process:
- Screwdriver (Phillips head or flathead, depending on your model)
- Nut driver or small wrench (if applicable)
- Gloves (for protection)
No special tools are typically required for this replacement part.
6. Орнату нұсқаулары (Орнату)
Follow these steps to replace the ice maker dispenser auger:
- Қуатты ажырату: Тоңазытқышты розеткадан ажыратыңыз.
- Access Ice Bucket: Open the freezer door and locate the ice maker assembly and ice bucket.
- Remove Ice Bucket: Carefully remove the ice bucket from its housing. This may involve lifting it up or pressing a release tab.
- Empty Ice: Empty any remaining ice from the bucket.
- Disassemble Ice Bucket (if necessary): Some ice buckets may require partial disassembly to access the auger. Look for screws or clips holding the auger in place.
- Remove Old Auger: Carefully remove the old, damaged auger. Note its orientation for proper installation of the new part.
- Install New Auger: Insert the new Generic ice maker dispenser auger into the ice bucket assembly, ensuring it seats correctly and aligns with any drive mechanisms.
- Reassemble Ice Bucket: Reassemble any parts of the ice bucket that were removed.
- Reinstall Ice Bucket: Place the ice bucket back into the freezer housing, ensuring it is securely seated.
- Қуатты қалпына келтіру: Тоңазытқышты қайтадан электр розеткасына қосыңыз.
- Test Dispenser: Allow the ice maker to produce ice, then test the dispenser to ensure proper operation.
If you encounter resistance or difficulty, do not force components. Refer to your refrigerator's specific service manual or seek professional assistance.
7. Пайдалану нұсқаулары
Once the new auger is installed, the ice maker system should resume normal operation. The auger works by rotating to push ice cubes from the storage bin through the dispenser chute when the dispenser lever is activated. Ensure the ice bucket is properly seated for the auger to engage with the motor.
- Allow several hours for the ice maker to produce a full bin of ice after installation.
- Press the dispenser lever to dispense ice. If the auger is functioning correctly, ice should be dispensed smoothly.
8. Техникалық қызмет көрсету
Regular maintenance can help prolong the life of your ice maker and auger:
- Таза мұз шелегі: Periodically remove and clean the ice bucket to prevent ice buildup or foreign objects from jamming the auger.
- Inspect Auger: During cleaning, visually inspect the auger for any signs of wear, cracks, or damage.
- Кептелістерді тазалау: If ice becomes jammed, disconnect power, remove the ice bucket, and carefully clear any obstructions.
9. Ақаулықтарды жою
If you experience issues after installing the replacement auger, consider the following common problems and solutions:
| Мәселе | Ықтимал себебі | Шешім |
|---|---|---|
| Мұз берілмейді |
|
|
| Шнек айналмайды |
|
|
| Uneven ice flow |
|
|
If troubleshooting steps do not resolve the issue, it may indicate a problem with another component of the ice maker assembly or the refrigerator itself. In such cases, professional diagnosis is recommended.
10. Техникалық сипаттамалар
| Ерекшелік | Мәлімет |
|---|---|
| Бөлшек нөмірі | WR17X11705DH468 |
| Бренд | Жалпы |
| Модель атауы | Refrigerator Ice Maker Dispenser Auger |
| Материал | Durable Plastic Spiral with Threaded Metal Rod Core |
| Өлшемдері (шамамен) | 1"D x 1"W x 1"H (Note: This is likely a packaging dimension, actual auger length is typically around 14 inches as per product description) |
| Үйлесімділік | Specific GE Refrigerator Models (see Section 2) |
11. Кепілдік және қолдау
For information regarding warranty coverage or technical support, please refer to the retailer or manufacturer from whom this product was purchased. Keep your proof of purchase for warranty claims.