1. Кіріспе
Thank you for choosing the Italeri 25756 1:56 Sd.Kfz. 142/1 StuG III Model Building Kit. This kit allows you to construct a detailed replica of the Sturmgeschütz III, a German assault gun from World War II. This manual provides essential information and guidance for assembling, painting, and caring for your model.
The kit includes all necessary plastic parts, decals, and illustrated assembly instructions. Please note that tools, glue, and paints are not included and must be purchased separately.
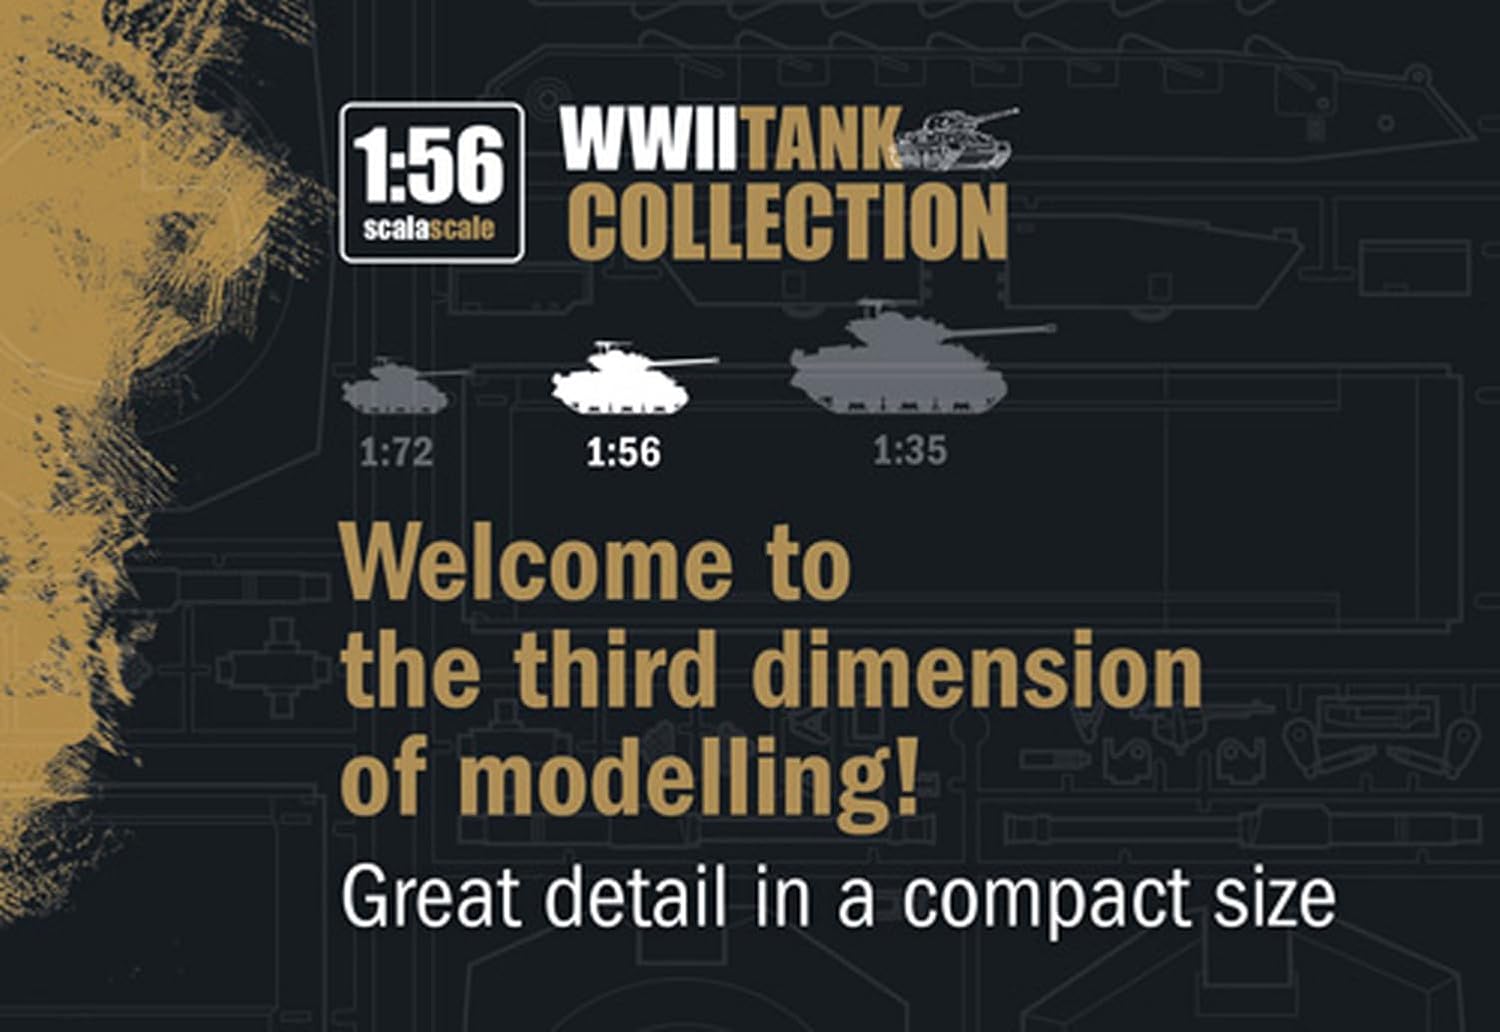
Image 1.1: Packaging for the Italeri 25756 StuG III Model Building Kit.
1.2 сурет: бұрынғыample of the fully assembled and painted StuG III model.
2. Қауіпсіздік туралы ақпарат
Құрастыруды бастамас бұрын барлық қауіпсіздік ескертулерін оқып, түсініп алыңыз.
- Жас бойынша ұсыныс: This model kit is not suitable for children under 14 years of age. It contains small parts that may pose a choking hazard.
- Sharp Tools: Assembly requires the use of sharp tools such as hobby knives and clippers. Always handle these tools with care and keep them out of reach of children.
- Adhesives and Paints: Use model-specific glues and paints in a well-ventilated area. Follow the manufacturer's safety instructions for all chemical products. Avoid inhaling fumes and direct skin contact.
- Шағын бөлшектер: Keep all small parts away from young children and pets to prevent accidental ingestion.
3. Before You Begin (Setup)
Proper preparation ensures a smooth and enjoyable building experience.
3.1 Ұсынылатын құралдар
- Side cutters or sprue nippers for removing parts from the sprues.
- Hobby knife or craft blade for trimming excess plastic (flash).
- Fine-grit sandpaper or sanding sticks for smoothing edges.
- Plastic cement (model glue) suitable for polystyrene.
- Tweezers for handling small parts and decals.
- Paints and brushes (or airbrush) as desired for finishing.
- Decal setting solution (optional, for better decal adhesion).
3.2 Жұмыс орнын дайындау
Set up a clean, well-lit, and well-ventilated workspace. Protect your work surface with a cutting mat or old newspaper. Organize your tools and parts to prevent loss or damage.
4. Құрастыру нұсқаулары
Follow the step-by-step illustrated assembly instructions provided within your kit. The following general guidelines apply:
- Бөлшектерді анықтау: Familiarize yourself with the parts on the sprues and their corresponding numbers in the instruction manual.
- Бөлшекті алып тастау: Carefully cut parts from the sprues using side cutters. Avoid pulling or twisting, which can damage parts.
- Тазалау: Trim any excess plastic (flash) from the parts using a hobby knife and smooth rough edges with sandpaper.
- Сынақ сәйкестігі: Before applying glue, always test fit parts to ensure they align correctly. Make any necessary adjustments.
- Желімдеу: Apply a small amount of plastic cement to the joining surfaces. Hold parts firmly together until the glue sets. Allow sufficient drying time before proceeding to the next step.
- Қосалқы ассамблеялар: Build the model in sub-assemblies (e.g., hull, turret, tracks) as indicated in the instructions, then combine them.
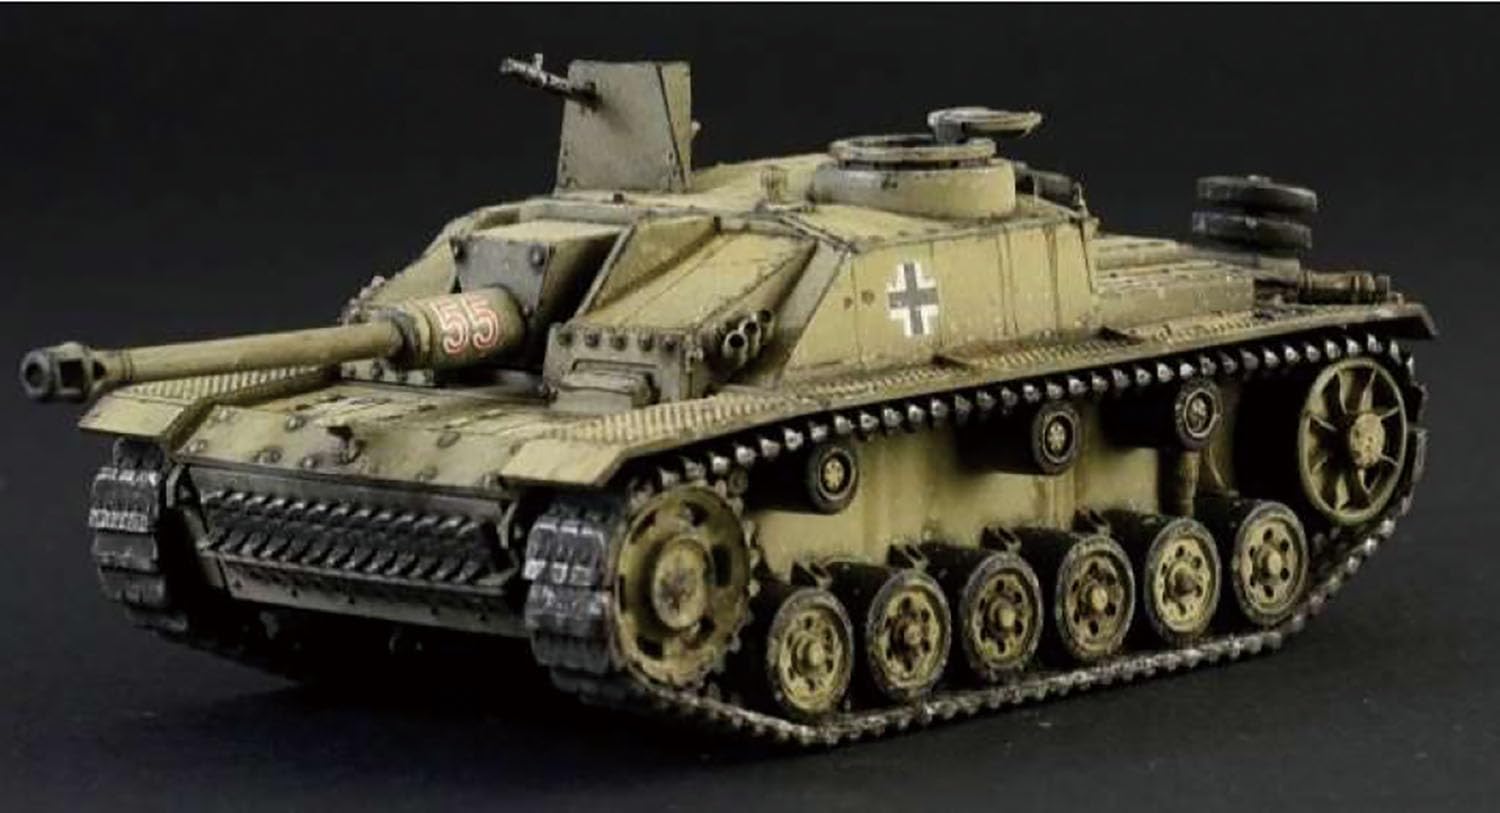
Image 4.1: One of the plastic sprues containing various parts for the StuG III model.
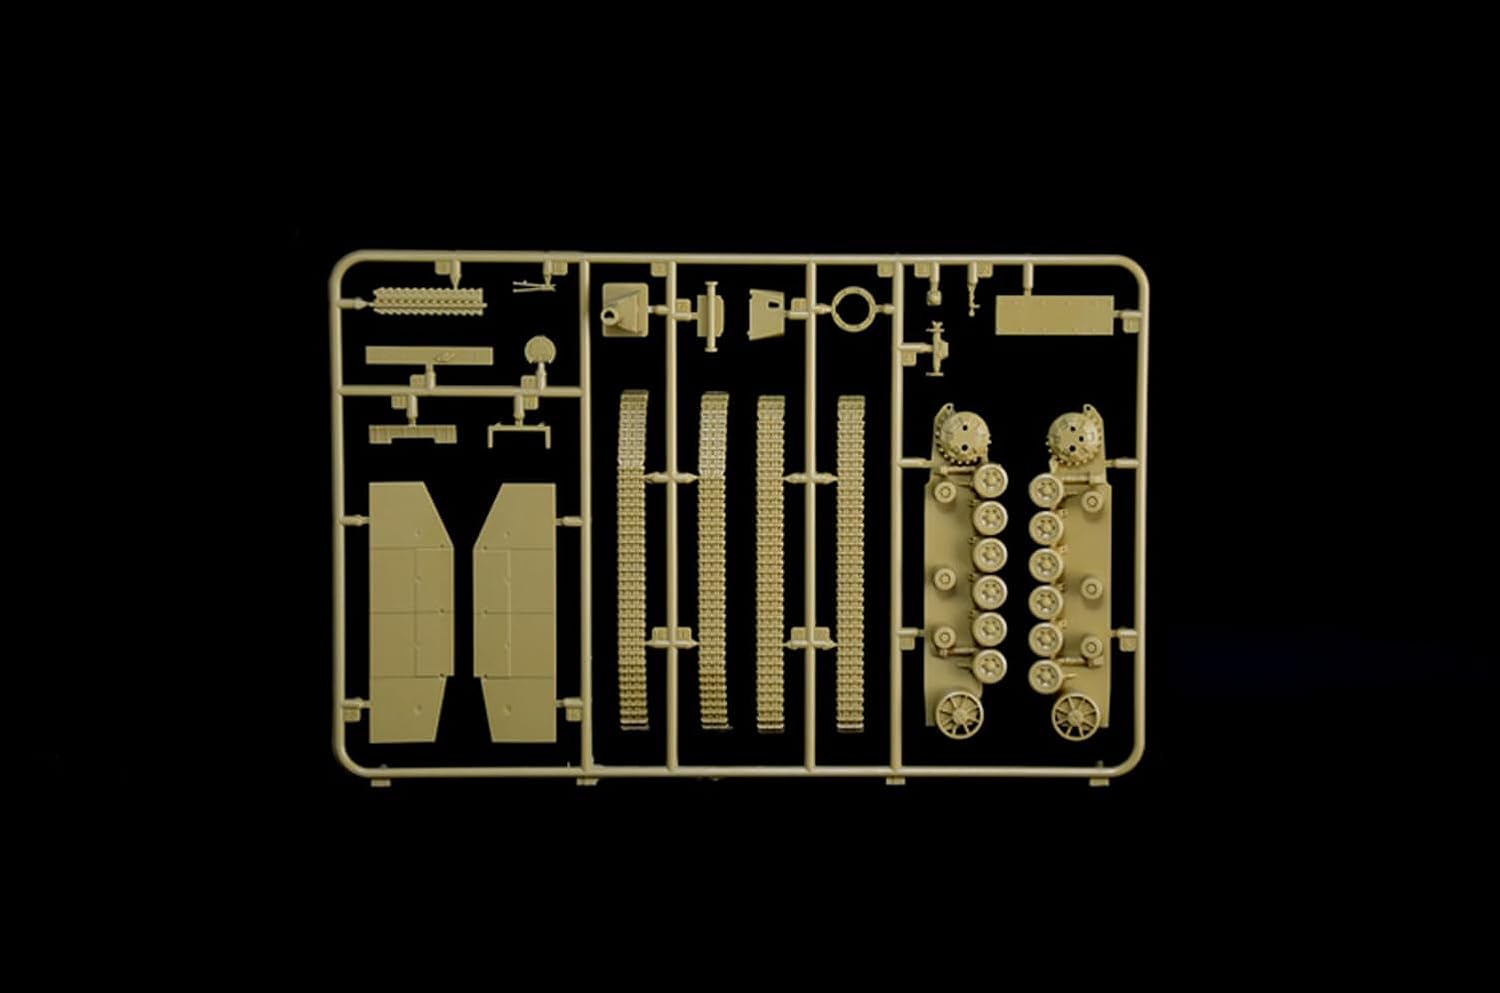
Image 4.2: Another plastic sprue with additional components for the model assembly.
5. Painting Guide
Painting your model adds realism and character. You can paint the model according to historical references or your own preferences. The kit provides options for different historical versions.
5.1 General Painting Tips
- Таза бет: Ensure the model surface is clean and free of dust, grease, or fingerprints before painting.
- Праймер: Applying a thin coat of primer can improve paint adhesion and provide a uniform base color.
- Thin Coats: Apply multiple thin coats of paint rather than one thick coat to avoid obscuring details.
- Кептіру уақыты: Allow each coat of paint to dry completely before applying the next or handling the model.
5.2 Paint Schemes
The kit offers options for different historical paint schemes. Refer to the included instructions for detailed color placement.
Version A: Sturmgeschütz-Brigade 907, Italy 1944/45
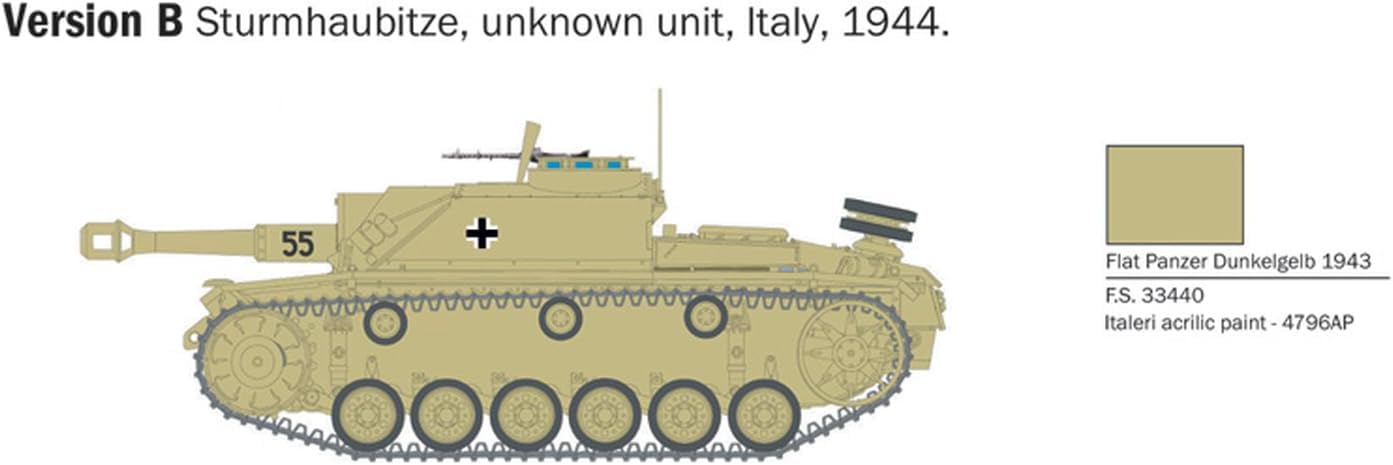
Image 5.1: Paint scheme for Version A, featuring Flat Panzer Dunkelgelb 1943 (F.S. 33440, Italeri acrylic paint - 4796AP).
Version B: Sturmhaubitze, unknown unit, Italy, 1944
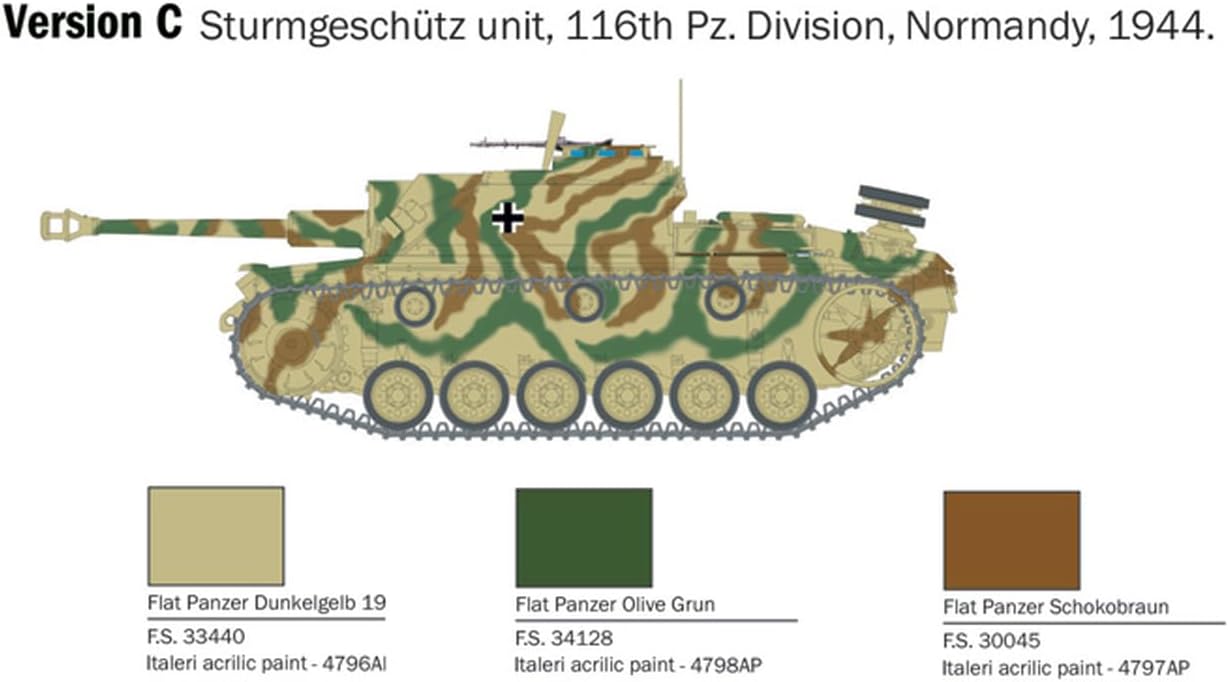
Image 5.2: Paint scheme for Version B, also using Flat Panzer Dunkelgelb 1943 (F.S. 33440, Italeri acrylic paint - 4796AP).
Version C: Sturmgeschütz unit, 116th Pz. Division, Normandy, 1944
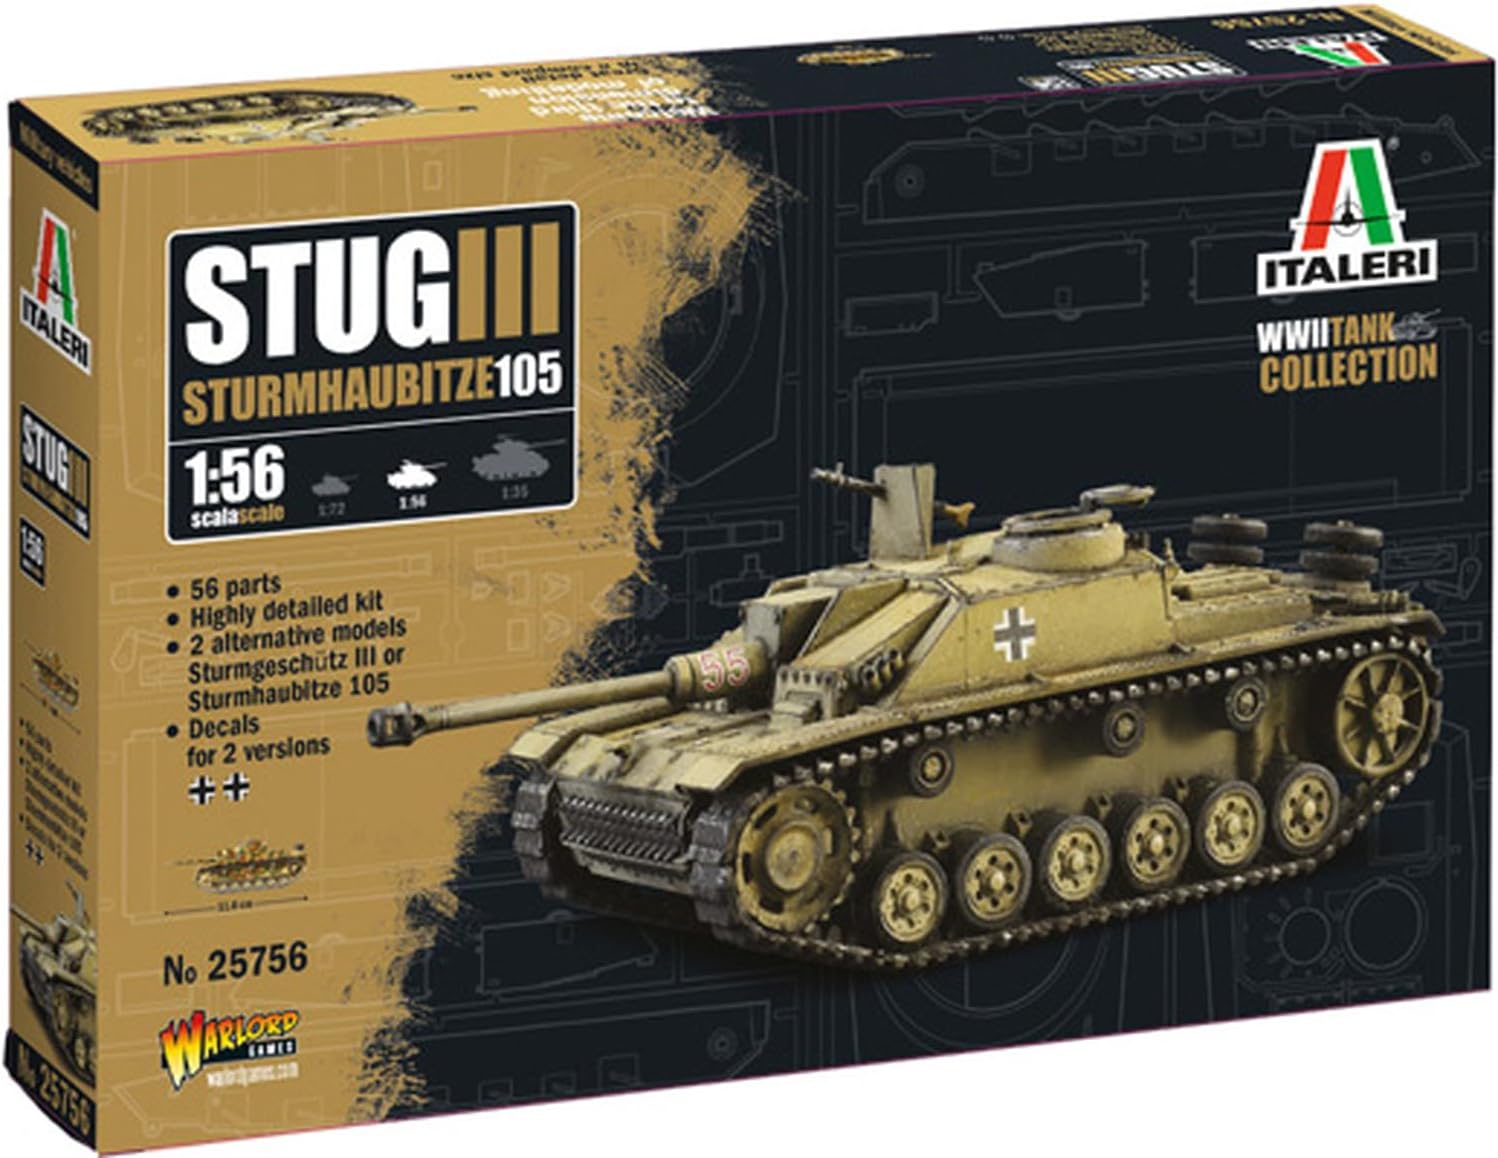
Image 5.3: Paint scheme for Version C, a camouflage pattern using Flat Panzer Dunkelgelb 19 (F.S. 33440, 4796AI), Flat Panzer Olive Grun (F.S. 34128, 4798AP), and Flat Panzer Schokobraun (F.S. 30045, 4797AP).
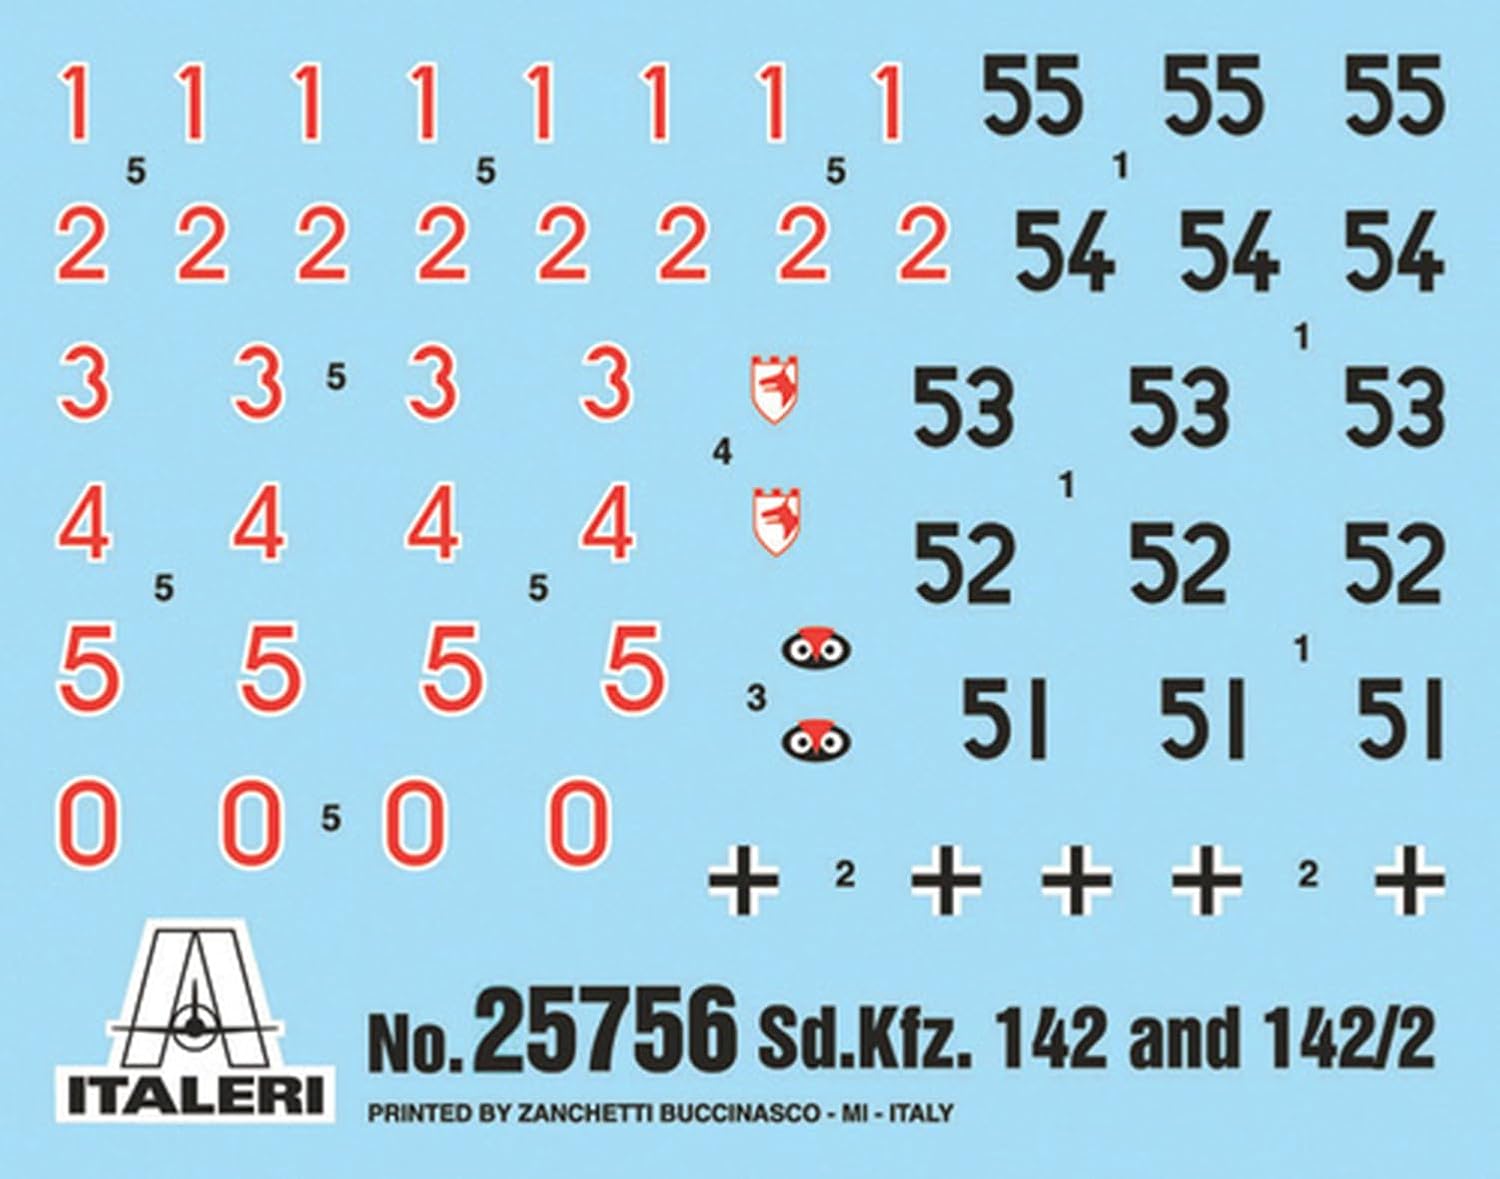
6. Декал қолданбасы
Decals add important markings and details to your model. The kit includes a decal sheet for various versions.
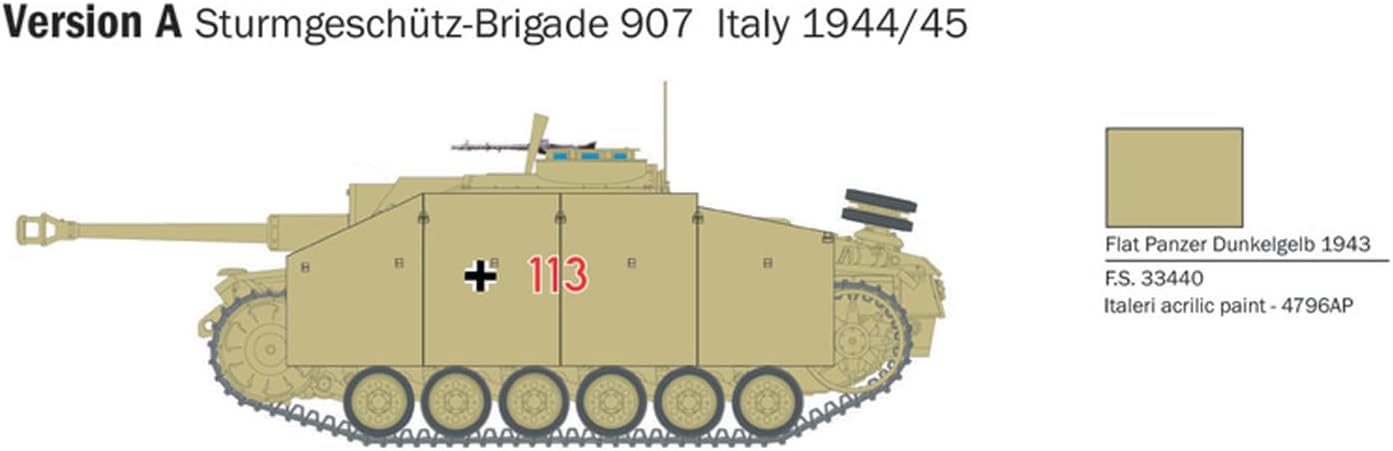
Image 6.1: The decal sheet included with the kit, featuring various numbers and insignia.
- Бетті дайындаңыз: Ensure the area where the decal will be applied is smooth and glossy. A gloss clear coat can be applied before decals for best results.
- Cut Decal: Carefully cut out the desired decal from the sheet using a hobby knife or scissors, leaving a small margin around the image.
- Soak Decal: Dip the decal in lukewarm water for 10-20 seconds until it can slide freely on its backing paper.
- Apply Decal: Gently slide the decal from its backing paper onto the model surface using tweezers or a soft brush. Position it carefully.
- Remove Water: Dab away excess water with a soft, lint-free cloth or cotton swab.
- Setting Solution (Optional): For irregular surfaces, apply a decal setting solution to help the decal conform to the model's contours.
- Seal Decal: Once dry, a matte or satin clear coat can be applied over the decals to protect them and blend them into the model's finish.
7. Дисплей және күтім
Once your model is complete, proper display and care will preserve its appearance.
- Көрсету орны: Display your model in a cool, dry place away from direct sunlight, which can fade paints and decals. Avoid areas with extreme temperature fluctuations.
- Шаңдану: Regularly dust your model with a soft brush or a can of compressed air to prevent dust buildup in crevices.
- Өңдеу: Handle the model by its base or sturdy parts to avoid damaging delicate details.
8. Өнімнің техникалық сипаттамалары
| Ерекшелік | Мәлімет |
|---|---|
| Бренд | Italeri |
| Үлгі нөмірі | 25756 |
| Масштаб | 1:56 |
| Тақырып кейіпкері | Sturmgeschütz III (Sd.Kfz. 142/1) |
| Материал түрі | Пластмасса |
| Бөлшектердің саны | 56 parts (as per feature bullets) |
| Элемент өлшемдері (L x W x H) | 10.16 x 6.38 x 1.5 дюйм |
| Элемент салмағы | 0.14 келі |
| Қосылған құрамдас бөліктер | Пластикалық жинақ |
| Ұсынылатын жас | 14 жыл және одан жоғары |
9. Кепілдік және қолдау
9.1 Кепілдік туралы ақпарат
This product is a model building kit and is sold without a guarantee. Please inspect all parts upon receipt. If you encounter any issues with missing or defective parts, please contact the retailer or manufacturer directly.
9.2 Тұтынушыларды қолдау қызметі
For further assistance or inquiries regarding your Italeri model kit, please refer to the contact information provided on the product packaging or visit the official Italeri webсайт.