BlitzWolf BW-VT2EU
BlitzWolf BW-VT2 шағын проекторының пайдаланушы нұсқаулығы
Your comprehensive guide to setting up, operating, and maintaining your BlitzWolf BW-VT2 Mini Projector.
1. Өнім аяқталдыview
1.1 Пакет мазмұны
Пакетте барлық элементтердің бар екенін тексеріңіз:
- BlitzWolf BW-VT2 Mini Projector
- Қашықтан басқару құралы
- Қуат адаптері
- HDMI кабелі
- Пайдаланушы нұсқаулығы (бұл құжат)
1.2 Құрылғының орналасуы
Familiarize yourself with the various parts and ports of your projector.
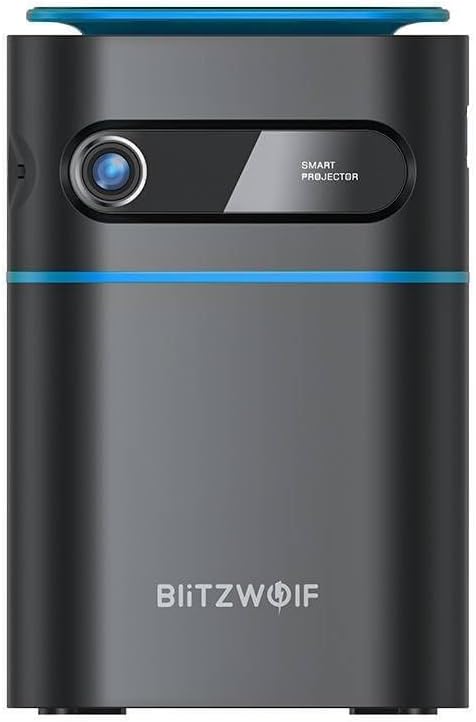
1.1-сурет: Алдыңғы View. This image displays the front of the BlitzWolf BW-VT2 Mini Projector, highlighting the projection lens and the 'SMART PROJECTOR' branding.

Figure 1.2: Projector with Remote Control. This image shows the BlitzWolf BW-VT2 Mini Projector alongside its dedicated remote control, illustrating the compact size of both devices.
1.3-сурет: Артқы View. The rear of the projector is shown, featuring ventilation grilles and various input/output ports.

1.4-сурет: жағы View. This image highlights the side of the projector where additional connectivity options such as USB and HDMI ports are located.

1.5-сурет: Жоғарғы View. The top surface of the projector is visible, featuring the integrated touch control panel for direct interaction.
1.3 Порттар және басқару элементтері
- HDMI порты: Connect to laptops, game consoles, Blu-ray players, etc.
- USB порты: Медиа ойнату үшін USB флэш-дискілерін қосыңыз.
- Audio Out (3.5mm) Port: Сыртқы динамиктерді немесе құлаққаптарды қосыңыз.
- DC IN порты: Қуат адаптерін қосыңыз.
- Қуат түймесі: Проекторды қосады/өшіреді.
- Фокус дөңгелегі: Суреттің анықтығын реттейді.
- Басқару тақтасын түртіңіз: Navigate menus and control playback directly on the device.
2. Орнату нұсқаулығы
2.1 Қуатты қосу
- Қуат адаптерін проектордағы DC IN портына қосыңыз.
- Қуат адаптерін қабырғадағы розеткаға қосыңыз.
- Press and hold the Power Button on the projector or the remote control until the device powers on.
2.2 Алғашқы орналастыру
Оңтайлы үшін viewing experience, consider the following:
- Проекторды тұрақты, тегіс бетке қойыңыз.
- Ensure there is adequate ventilation around the projector to prevent overheating.
- Тікбұрышты кескін үшін проекторды проекция бетіне (қабырғаға немесе экранға) перпендикуляр орналастырыңыз.
- Adjust the distance to achieve your desired screen size.
2.3 Фокусты реттеу
After powering on, adjust the focus to ensure a clear image:
- Rotate the focus wheel located near the lens until the projected image appears sharp and clear.
2.4 Қашықтан басқару пультін орнату
Insert batteries into the remote control before first use:
- Қашықтан басқару пультінің артқы жағындағы батарея бөлімінің қақпағын ашыңыз.
- Дұрыс полярлықты (+/-) қамтамасыз ете отырып, екі AAA батареясын (жинаққа кірмейді) салыңыз.
- Батарея бөлігінің қақпағын жабыңыз.
3. Пайдалану нұсқаулары
3.1 Навигация
You can navigate the projector's interface using either the remote control or the touch control panel on top of the device.
- Қашықтан басқару пульті: Use the directional buttons (up, down, left, right) to move through menus and the 'OK' button to select.
- Басқару тақтасын түртіңіз: Swipe and tap on the touch-sensitive surface to navigate.
3.2 Құрылғыларды қосу
The BW-VT2 supports various input sources:
- HDMI кірісі: Connect your laptop, game console, or other HDMI-enabled devices using an HDMI cable. Select the HDMI input source from the projector's menu.
- USB кірісі: Insert a USB flash drive into the USB port. The projector's media player will typically detect the drive automatically, allowing you to browse and play supported media fileс (бейнелер, фотосуреттер, музыка).
- Wi-Fi қосылымы: Navigate to the 'Settings' menu, then 'Network' or 'Wi-Fi'. Select your Wi-Fi network and enter the password to connect the projector to the internet. This enables access to online streaming apps and updates.
3.3 Android ОЖ мүмкіндіктері
As an Android-powered projector, the BW-VT2 offers smart functionalities:
- Қолданбаға кіру: Download and install various streaming apps (e.g., Netflix, YouTube) directly from the pre-installed app store or by sideloading APKs.
- Параметрлер: Customize display settings, audio output, network configurations, and system preferences through the Android settings menu.
- Экранды көрсету: Utilize built-in screen mirroring features (e.g., Miracast, AirPlay compatible apps) to project content from your smartphone or tablet wirelessly.
3.4 Аудио шығысы
The projector has built-in speakers, but you can also connect external audio devices:
- 3.5 мм аудио шығысы: Connect headphones or external speakers via the 3.5mm audio jack for enhanced sound.
4. Техникалық қызмет көрсету
Дұрыс техникалық қызмет көрсету проекторыңыздың ұзақ қызмет ету мерзімін және оңтайлы өнімділігін қамтамасыз етеді.
4.1 Линзаны тазалау
To maintain clear image quality, clean the projector lens regularly:
- Use a soft, lint-free cloth specifically designed for optical lenses.
- Gently wipe the lens in a circular motion.
- Avoid using abrasive cleaners or excessive force, which can scratch the lens.
4.2 Желдету
Ensure proper airflow to prevent overheating:
- Do not block the ventilation vents on the projector.
- Проекторды жақсы желдетілетін жерде пайдаланыңыз.
- Periodically clean dust from the vents using a soft brush or compressed air.
4.3 Сақтау
When not in use, store your projector properly:
- Store the projector in a cool, dry place, away from direct sunlight and extreme temperatures.
- Use the original packaging or a protective case to prevent dust accumulation and physical damage.
5. Ақаулықтарды жою
Жалпы мәселелер және олардың шешімдері үшін осы бөлімді қараңыз.
| Мәселе | Ықтимал себебі | Шешім |
|---|---|---|
| Projector does not power on. | No power connection; faulty power adapter. | Ensure power adapter is securely connected to both projector and outlet. Try a different outlet. |
| Кескін проекцияланбады. | Incorrect input source selected; loose HDMI/USB cable. | Verify the correct input source is selected in the menu. Check cable connections. |
| Кескін бұлыңғыр. | Focus not adjusted; projector too close/far. | Rotate the focus wheel until the image is clear. Adjust projection distance if necessary. |
| Дыбыс жоқ. | Volume too low; external audio device not connected properly. | Increase volume. Check connections to external speakers/headphones. Ensure audio output is set correctly in settings. |
| Wi-Fi байланысы мәселелері. | Қате пароль; маршрутизатор мәселелері; сигнал кедергісі. | Re-enter Wi-Fi password. Restart router. Move projector closer to router. |
| Қашықтан басқару пульті жұмыс істемейді. | Өлген батареялар; кедергі; қашықтан басқару құралы жұпталмаған. | Replace batteries. Ensure no obstruction between remote and projector. |
6. Техникалық шарттар
Key specifications of the BlitzWolf BW-VT2 Mini Projector:
| Ерекшелік | Техникалық сипаттама |
|---|---|
| Бренд | Блиц-волф |
| Үлгі нөмірі | BW-VT2EU |
| Түс | Қара |
| Қосылу технологиясы | HDMI, USB, VGA, Wi-Fi |
| Дисплей ажыратымдылығы | 1920 x 1080 (Full HD) |
| Дисплей түрі | СКД, жарықдиодты |
| Форма факторы | Портативті |
| Арнайы мүмкіндіктер | Portable, Android OS, Wi-Fi, HDMI, USB, VGA |
| Үйлесімді құрылғылар | Laptops, Smartphones, Game Consoles, Blu-ray Players, Media Players, Wi-Fi enabled devices |
| Ұсынылатын пайдаланулар | Үй кинотеатры |
7. Кепілдік және қолдау
7.1 Өндірушінің кепілдігі
The BlitzWolf BW-VT2 Mini Projector comes with a 2 жылдық өндірушінің кепілдігі. Бұл кепілдік қалыпты пайдалану кезіндегі материалдар мен жұмыс ақауларын қамтиды. Кепілдік шағымдары үшін сатып алуды растайтын құжатты сақтаңыз.
7.2 Тұтынушыларды қолдау қызметі
If you encounter issues not covered in the troubleshooting section or require further assistance, please contact BlitzWolf customer support. Refer to the product packaging or the official BlitzWolf webең соңғы байланыс ақпаратына арналған сайт.
Ask a question about this manual
Ask about setup, troubleshooting, compatibility, parts, safety, or missing instructions. Manuals+ will review the question and use this page’s manual context to help answer it.