TIDRADIO TD-H3 GMRS Radio
TIDRADIO TD-H3 GMRS Radio User Manual
Model: TD-H3 GMRS Radio | Brand: TIDRADIO
Кіріспе
The TIDRADIO TD-H3 GMRS Radio is a versatile and high-performance two-way radio designed for reliable communication. It features multi-band receiving capabilities, USB-C programming and charging, and a range of advanced functions including wireless radio replication and one-key frequency matching. This manual provides essential information for the proper setup, operation, and maintenance of your TD-H3 radio.
Қауіпсіздік туралы ақпарат
Always observe the following safety precautions to reduce the risk of fire, electric shock, or personal injury:
- Радионы жарылғыш ортада (мысалы, жанғыш газдар, шаң бөлшектері, металл ұнтақтары) пайдаланбаңыз.
- Радионы ұзақ уақыт бойы тікелей күн сәулесінің астында қалдырмаңыз немесе оны жылыту құрылғыларының жанына қоймаңыз.
- Use only TIDRADIO-approved batteries and chargers. Unauthorized accessories may cause damage or injury.
- Радионы бөлшектемеңіз немесе өзгертпеңіз. Жөндеу жұмыстарын тек білікті мамандар ғана жүргізуі керек.
- Keep the radio and its accessories out of reach of children.
- Ensure the antenna is properly attached before transmitting to prevent damage to the radio.
Пакет мазмұны
Пакетте барлық элементтердің бар екенін тексеріңіз:
- 1 x TIDRADIO TD-H3 GMRS Radio Handheld
- 1 x USB-C Cable (for Programming and Charging)
- 1 x 2500 мАч батарея
- 1 x USB қабырға зарядтағыш
- 1 x Standard Antenna
- 1 x белдік қысқышы
- 1 x бау
- 1 x Пайдаланушы нұсқаулығы (осы құжат)

Figure 1: Contents of the TD-H3 GMRS Radio package.
Орнату
1. Батареяны орнату
- Батареяны радионың артқы жағындағы батарея бөлімімен туралаңыз.
- Батареяны қауіпсіз шерткенше орнына жайлап итеріңіз.
- To remove, press the battery release latch (if present) and slide the battery out.
2. Антеннаны орнату
Screw the provided antenna clockwise into the antenna connector on the top of the radio until it is finger-tight. Do not overtighten.
3. Бастапқы зарядтау
Before first use, fully charge the battery. The TD-H3 supports USB-C charging.
- Connect the USB-C cable to the charging port on the radio or battery.
- Connect the other end of the USB-C cable to the USB wall charger or another compatible USB power source (e.g., power bank, car charger, laptop).
- The charging indicator light on the radio will show charging status (refer to radio display for details). Charging typically takes several hours.

Figure 2: Flexible USB-C charging options for the TD-H3.
4. Радионы бағдарламалау
The TD-H3 offers multiple programming methods:
- USB-C Data Cable Programming: Use the included USB-C cable to connect the radio to a computer. This method allows for firmware updates and detailed channel management.
- Odmaster App (Wireless Programming): Download the 'Odmaster' app from Google Play Store or App Store for wireless programming via your smartphone.
- CHIRP Software: The TD-H3 supports CHIRP programming software. Select 'TIDRADIO → TD-H3-GMRS' within CHIRP.
- CPS (Manufacturer Software): Visit walkietalkiesoftware.com for the official CPS software and firmware upgrades.
- Kenwood 2-PIN Cable: The radio is also compatible with Kenwood 2-PIN programming cables.

Figure 3: USB-C programming interface on a computer.
Пайдалану нұсқаулары
1. Қуатты қосу/өшіру және дыбыс деңгейі
Rotate the power/volume knob (typically located on top of the radio) clockwise to turn on the radio and increase volume. Rotate counter-clockwise to decrease volume and turn off the radio.
2. Арна таңдау
The TD-H3 supports up to 199 channels. Use the up/down arrow keys or the numeric keypad to select desired channels. The 1.44-inch TFT color screen will display the current channel and frequency.
3. Беру және қабылдау
The TD-H3 GMRS radio is preset to receive and transmit on 30 fixed GMRS frequencies (462.5500 ~ 467.7250 MHz).
- Тасымалдау үшін: Радионың бүйіріндегі Push-To-Talk (PTT) түймесін басып тұрыңыз. Микрофонға анық сөйлеңіз. Тыңдау үшін PTT түймесін жіберіңіз.
- Қос PTT: The TD-H3 features dual PTT buttons, allowing for quick switching between two active frequencies or channels.
- Қабылдау: The radio will automatically receive signals on the selected channel. Adjust volume for clear reception.
4. Multi-Band Receiving
The TD-H3 offers extensive receiving capabilities across 8 bands:
- FM: 50-76 MHz (RX)
- AM: 76-108 MHz (RX)
- 108-136 MHz (RX - Aviation Band)
- VHF: 136-174 MHz (RX)
- 174-350 МГц (RX)
- 350-400 МГц (RX)
- UHF: 400-470 MHz (RX)
- 470-600 МГц (RX)
Note: AM frequency programming is currently only available through the CPS software.

Figure 4: TD-H3 Multi-band Receiving Frequencies.
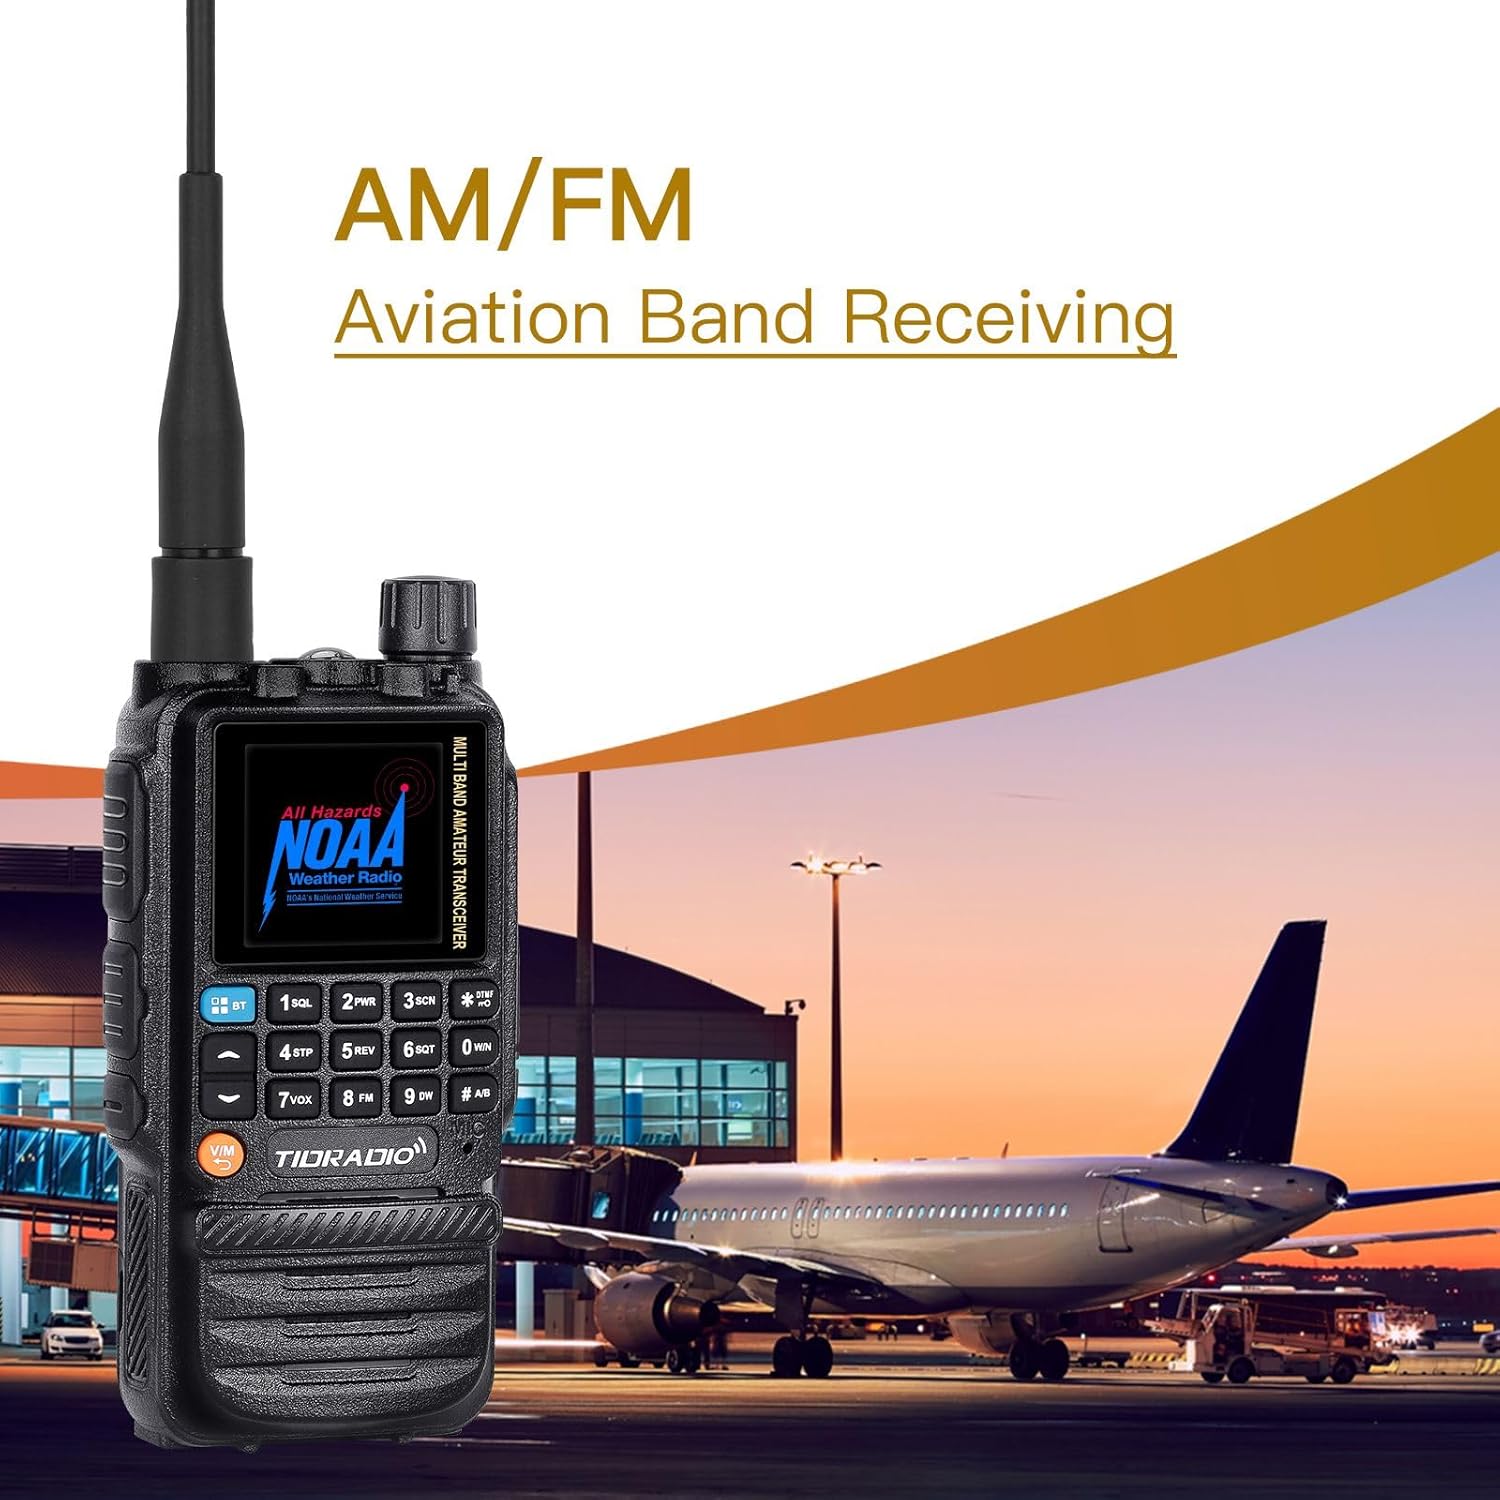
Figure 5: AM/FM Aviation Band Receiving.
5. One Key Frequency Match
This feature allows for quick frequency matching with another radio:
- Enable the Dec.code function (Menu 47).
- Long press the button [1] to enter the Match interface.
- When another radio transmits, your TD-H3 will display its frequency and CTCSS/DCS code, allowing for quick synchronization.
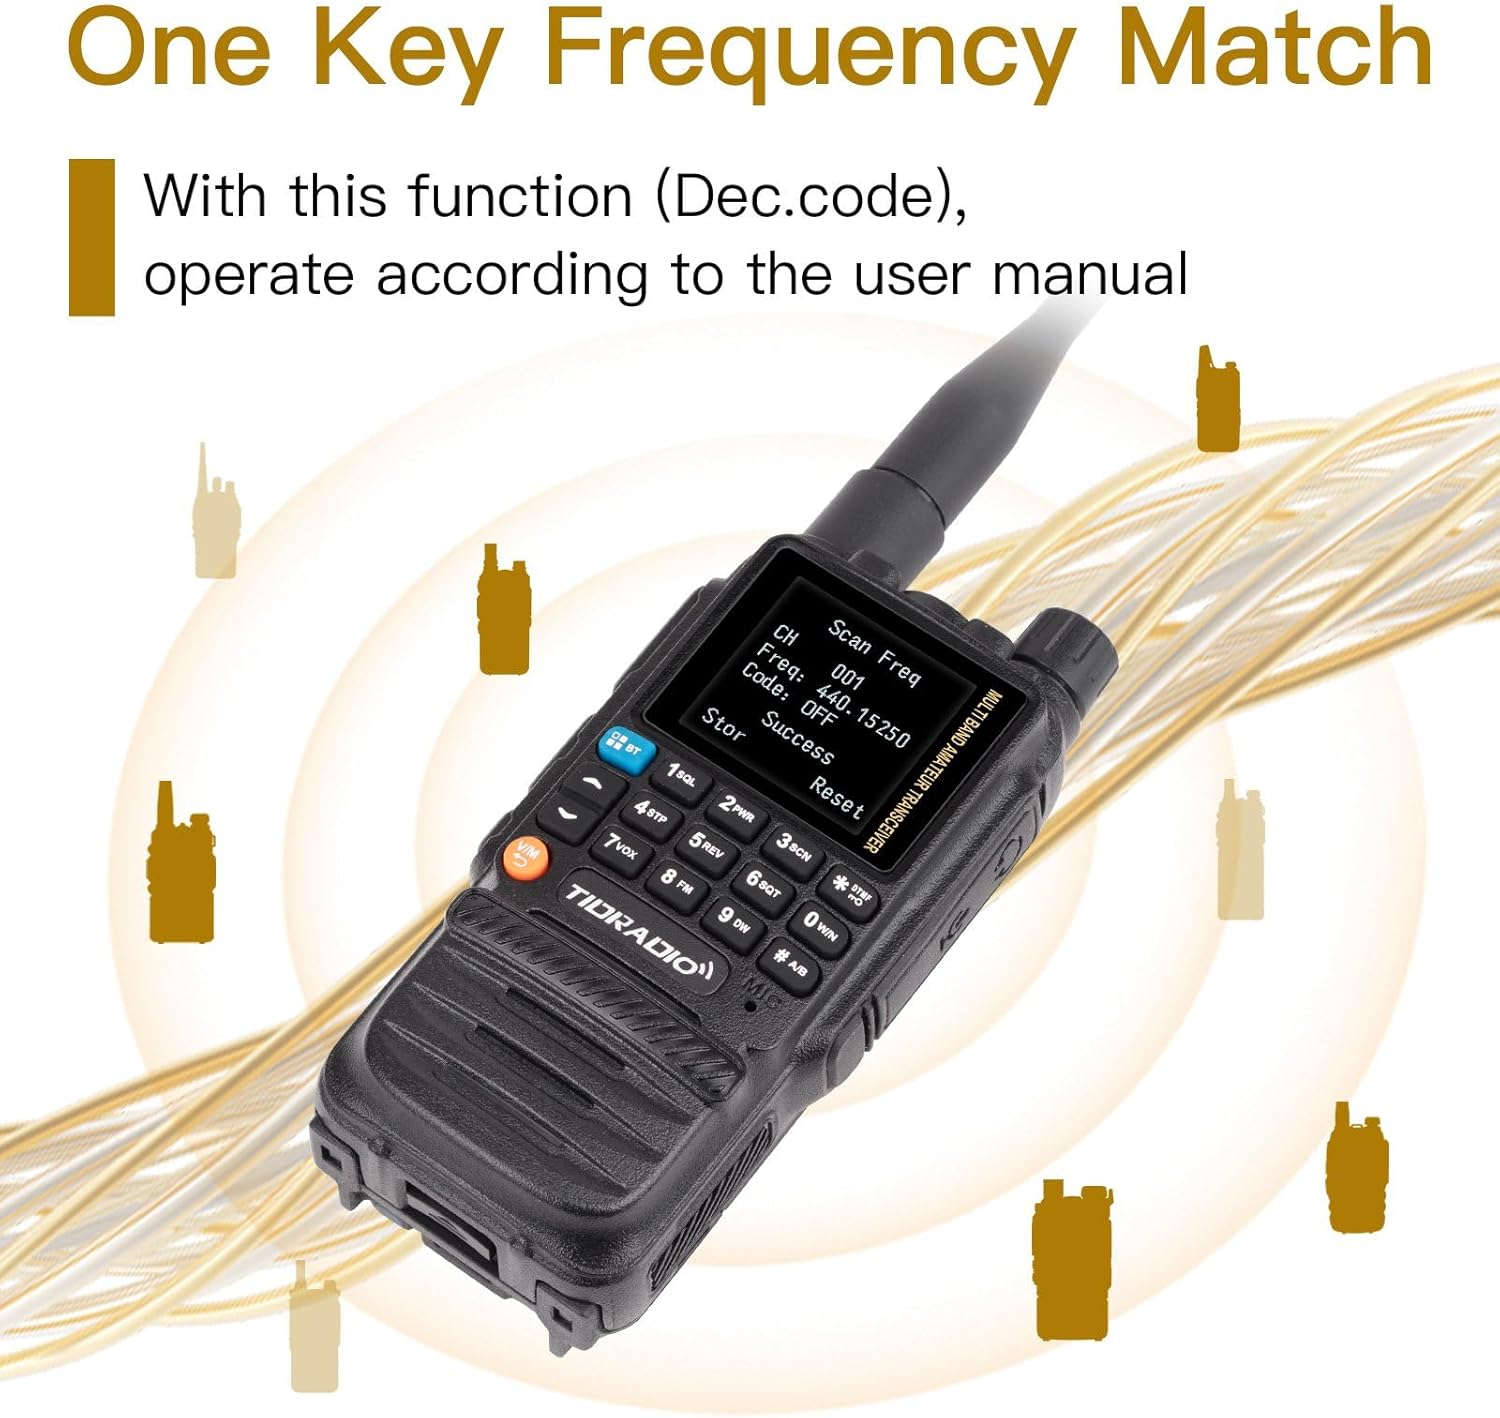
Figure 6: One Key Frequency Match in action.
6. Wireless Radio Replication
This function allows you to wirelessly copy channel settings from one TD-H3 radio to another (Note: Only available between identical TD-H3 radios).
- Long press the Customized button and turn on the radio simultaneously to enter the Replication interface.
- Press the Customized Button again to activate the Replication process.

Figure 7: Wireless Radio Replication between two TD-H3 units.
7. Басқа мүмкіндіктер
- DTMF Function: For tone signaling and control.
- NOAA ауа райы радиосы: Ауа райы туралы ескертулер алыңыз.
- VOX (Voice Operated Transmit): Hands-free transmission.
- SCAN: Scan through channels for activity.
- MIC кірісі: Микрофон сезімталдығын реттеңіз.
- Frog End Tone: Audible tone at the end of transmission.
- Төтенше ескерту: Апаттық сигнал беру үшін.
- Repeater Tone: For accessing repeaters.
- Жарықдиодты шам: Built-in light for convenience.
- Dual Watch/Dual Display: Бір уақытта екі жиілікті бақылаңыз.
Техникалық қызмет көрсету
1. Батареяны күту
- Бірінші пайдалану алдында батареяны толығымен зарядтаңыз.
- Батареяны шамадан тыс зарядтамаңыз немесе толығымен таусып алмаңыз, себебі бұл оның қызмет ету мерзімін қысқартуы мүмкін.
- Егер радио ұзақ уақыт пайдаланылмайтын болса, батареяны алып тастап, салқын, құрғақ жерде сақтаңыз.
- If you experience battery issues, contact TIDRADIO support.
2. Тазалау
Радионың бетін жұмсақ шүберекпен сүртіңіз, damp cloth. Do not use harsh chemicals or abrasive cleaners. Ensure the USB-C port cover is closed to maintain water resistance.
3. Сақтау
Радионы құрғақ, шаңы жоқ ортада төтенше температура мен тікелей күн сәулесінен алыс жерде сақтаңыз.
Ақаулықтарды жою
If you encounter problems with your TD-H3 radio, refer to the following common issues and solutions:
- Берілмейді:
- Ensure you are on a valid GMRS frequency (462.5500 ~ 467.7250 MHz).
- Батарея зарядталғанын тексеріңіз.
- Verify that the radio is not in a receive-only mode.
- If the frequency is set correctly and transmission still fails, contact technical support.
- Kill Lock Issue:
- In the TD-H3 programming software (CPS), go to Edit → DTMF and remove the 'kill' tick, then write data to the radio.
- Alternatively, press the '*' button to enable DTMF input, enter your set kill code + '#', then press the PTT button to send.
- Unable to Hit Repeaters:
- In VFO mode, check Menu 23 (Direction) and Menu 24 (Offset) settings.
- Set Menu 34, Menu 47, and Menu 49 items to "Off".
- Ensure the radio's receive frequency matches the repeater's transmit frequency, and the radio's transmit frequency matches the repeater's receive frequency.
- If applicable, set the same CTCSS/DCS sub-tone code as the repeater.
- Programming Difficulties:
- Ensure you are using the correct software version (CHIRP: 'TIDRADIO → TD-H3-GMRS'; CPS from walkietalkiesoftware.com; Odmaster app).
- Verify the USB-C cable connection.
- Contact technical support for programming assistance.
- Battery Won't Charge:
- Басқа USB-C кабелін және қуат адаптерін қолданып көріңіз.
- Test the battery with another compatible TD-H3 radio or try another battery with your radio to isolate the issue.
- If the problem persists, contact seller support via Amazon.
Техникалық сипаттамалар
| Ерекшелік | Техникалық сипаттама |
|---|---|
| Үлгі нөмірі | TD-H3 GMRS Radio |
| Бренд | TIDRADIO |
| Түс | Қара |
| Арналар саны | 199 |
| Frequency Range (Tx/Rx) | GMRS: 462.5500 ~ 467.7250 MHz |
| Frequency Range (Rx Only) | FM: 50-76 MHz, AM: 76-108 MHz, 108-136 MHz, VHF: 136-174 MHz, 174-350 MHz, 350-400 MHz, UHF: 400-470 MHz, 470-600 MHz |
| Батарея Түрі | Литий полимері |
| Батарея сыйымдылығы | 2500 мАч |
| Тtage | 7.4 вольт |
| Элемент салмағы | 15.5 унция |
| Пакет өлшемдері | 10.04 x 7.09 x 2.2 дюйм |
| Суға төзімділік деңгейі | Суға төзімді |
| Арнайы мүмкіндіктер | USB-C Programming & Charging, AM/FM Reception, 8-band Receiving, Wireless Radio Replication, Dual PTT/Dual Watch/Dual Display, One Key Frequency Match, NOAA, VOX, SCAN, DTMF, LED Flashlight |

Figure 8: Key features of the TD-H3 radio.

Figure 9: Back of the TD-H3 radio with product details.
Кепілдік және қолдау
TIDRADIO provides a one-year support for the TD-H3 GMRS Radio. For any technical issues, questions, or support needs, please contact TIDRADIO directly via Amazon's messaging system. A dedicated technical team is available to provide professional assistance and resolve any problems you may encounter.
For the most up-to-date information and resources, including firmware updates and programming software, please visit the official TIDRADIO webсайт: walkietalkiesoftware.com.
Ask a question about this manual
Ask about setup, troubleshooting, compatibility, parts, safety, or missing instructions. Manuals+ will review the question and use this page’s manual context to help answer it.