1. Өнім аяқталдыview
The GOLOZA LA-C337 is a versatile digital alarm clock featuring a 180° rotatable projection, a large curved LED display, and a convenient USB charging port. It is designed for clear time display and easy operation.

Image 1.1: The GOLOZA Digital Projection Alarm Clock, showcasing its curved display and compact design, placed on a nightstand.
2. Пакет мазмұны
Пакетте келесі элементтердің бар-жоғын тексеріңіз:
- GOLOZA Digital Projection Alarm Clock (LA-C337)
- Микро USB кабелі
- Қуат адаптері
- Пайдаланушы нұсқаулығы
3. Өнімнің ерекшеліктері
- Curved LED Display: Large, clear digital time display with adjustable brightness.
- 180° проекциясы: Projects time onto a wall or ceiling with adjustable brightness and rotation.
- Қос дабыл: Set two independent alarms with progressive volume.
- Кейінге қалдыру функциясы: Allows for extra sleep time after the alarm sounds.
- USB зарядтау порты: Conveniently charge your mobile devices.
- Жад батареясы: Built-in button battery maintains time settings during power outages.
Кескін 3.1: Жақын планда view of the GOLOZA Digital Projection Alarm Clock's clear, blue LED display, showing the time.
4. Бастапқы орнату
4.1 Қуат қосылымы
- Connect the Micro USB cable to the power input port on the back of the alarm clock.
- USB кабелінің екінші ұшын берілген қуат адаптеріне қосыңыз.
- Insert the power adapter into a standard electrical outlet. The clock display will light up.
Ескерту: The built-in button battery serves as a backup for time and alarm settings during a power interruption. It does not power the main display or projection.
4.2 Уақыт пен күнді орнату
Specific button names are not provided, but typically these clocks have 'TIME SET', 'MODE', or similar buttons. Refer to the physical unit for exact button labels.
- түймесін басып тұрыңыз Уақыт орнату button (or similar) to enter time setting mode. The hour digits will flash.
- пайдаланыңыз +/- or Жоғары/төмен түймелері сағатты реттеуге арналған.
- түймесін басыңыз Уақыт орнату Сағатты растау және минут параметріне өту үшін түймесін қайтадан басыңыз. Минут сандары жыпылықтайды.
- пайдаланыңыз +/- or Жоғары/төмен минуттарды реттеу үшін түймелер.
- түймесін басыңыз Уақыт орнату button again to confirm minutes and exit time setting mode.
- Follow similar steps to set the date if your model supports it (usually by pressing the Time Set button multiple times to cycle through year, month, day).
5. Пайдалану нұсқаулары
5.1 Дабылдарды орнату
The clock supports two independent alarms (Alarm 1 and Alarm 2).
- түймесін басып тұрыңыз Дабыл 1 button (or similar) to enter Alarm 1 setting mode. The alarm hour digits will flash.
- пайдаланыңыз +/- or Жоғары/төмен түймелері дабыл сағатын реттеуге арналған.
- түймесін басыңыз Дабыл 1 button again to confirm the hour and move to minute setting. The alarm minute digits will flash.
- пайдаланыңыз +/- or Жоғары/төмен түймелері дабыл минуттарын реттеуге арналған.
- түймесін басыңыз Дабыл 1 button again to confirm minutes and select the alarm sound (e.g., Beep, Chord, Bird Song).
- түймесін басыңыз Дабыл 1 button one more time to activate/deactivate Alarm 1 and exit setting mode. An alarm icon will appear on the display when active.
- үшін процесті қайталаңыз Дабыл 2 сәйкес түймені пайдалану.
5.2 Дисплей жарықтығын реттеу
The main LED display typically has multiple brightness levels.
- түймесін басыңыз Жарықтық button (or a dedicated dimmer button) repeatedly to cycle through the available brightness levels (e.g., High, Medium, Low, Off).
5.3 Using Projection Feature
The projection feature allows you to view the time on a wall or ceiling.
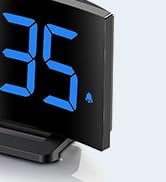
Image 5.1: The GOLOZA Digital Projection Alarm Clock actively projecting the time onto a surface, demonstrating its projection capability.
- Activating/Deactivating Projection: түймесін басыңыз Проектор button (or similar) to turn the projection on or off.
- Adjusting Projection Brightness: While the projector is on, press the Projector Brightness button (or the same Projector button repeatedly) to cycle through brightness levels (e.g., High, Medium, Low).
- Айналмалы проекция: The projector lens can be physically rotated 180° to adjust the projection angle. Some models may also have a button to flip the projected image.
5.4 USB Charging Port Usage
The integrated USB port allows you to charge external devices.
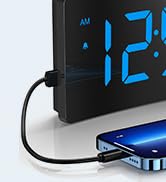
Image 5.2: The GOLOZA Digital Projection Alarm Clock with a smartphone connected to its USB charging port, illustrating its charging capability.
- Құрылғыңыздың USB зарядтау кабелін оятқыш сағаттағы USB шығыс портына қосыңыз.
- Оятқыш сағаттың қосулы екеніне көз жеткізіңіз.
- The clock's USB port provides power to charge your device.
5.5 Кідірту функциясы
Дабыл естілгенде түймесін басыңыз Кідірту button (often a large button on top) to temporarily silence the alarm. The alarm will sound again after a preset interval (e.g., 9 minutes).
5.6 Дабыл дыбысын реттеу
The alarm volume is progressive, meaning it starts soft and gradually increases. Some models may offer adjustable volume levels.
- Қолжетімді болса, түймесін басыңыз Көлемі button (or a dedicated switch) to adjust the alarm volume to your preferred level.
6. Техникалық қызмет көрсету
- Тазалау: Сағатты жұмсақ, құрғақ шүберекпен сүртіңіз. Абразивті тазартқыштарды немесе еріткіштерді қолданбаңыз.
- Орналастыру: Place the clock on a stable, flat surface away from direct sunlight, heat sources, and moisture.
- Батарея: The internal button battery is for memory backup. If the clock consistently loses settings after a power outage, the battery may need replacement by a qualified technician.
7. Ақаулықтарды жою
| Мәселе | Ықтимал себебі | Шешім |
|---|---|---|
| Сағат дисплейі өшірулі. | Қуат қосылымы жоқ. | Қуат адаптерінің сағатқа және жұмыс істейтін электр розеткасына мықтап жалғанғанына көз жеткізіңіз. |
| Проекция күңгірт немесе анық емес. | Incorrect brightness setting; dirty lens; too much ambient light. | Adjust projection brightness. Clean the projector lens with a soft cloth. Reduce ambient light in the room. |
| Дабыл естілмейді. | Дабыл іске қосылмаған; дабылдың дыбыс деңгейі тым төмен. | Ensure the alarm icon is visible on the display. Check and adjust alarm volume. |
| Time settings are lost after power outage. | Internal backup battery is depleted or faulty. | The internal button battery may need replacement. Contact customer support. |
| USB арқылы зарядтау жұмыс істемейді. | Clock not powered; faulty USB cable; device not compatible. | Ensure the clock is powered. Try a different USB cable. Check device compatibility. |
8. Техникалық сипаттамалар
| Ерекшелік | Мәлімет |
|---|---|
| Үлгі нөмірі | LA-C337 |
| Өлшемдері (L x W x H) | 17.7 x 3.81 x 7.8 см |
| Салмағы | 310 грамм |
| Бренд | ГОЛОЗА |
| Түс | Көк |
| Стиль | Modern/Elegant/Minimalist |
| Арнайы мүмкіндіктер | Integrated Design, Built-in Button Battery (for memory), USB Charging Port, Super Clear Projection, Progressive Volume, Curved Display |
| Қуат көзі | Electrical (USB Powered) |
| Пішін | Rectangular, Curved Screen |
| Батареялар кіреді | No (Internal button battery for memory backup is pre-installed but not user-replaceable) |
| UPC/GTIN | 647697054284 |
9. Кепілдік және қолдау
GOLOZA is committed to providing quality products and customer satisfaction.
- ТАУАРДЫ ҚАЙТАРУ ШАРТТАРЫ: 6 Months Return period.
- Кепілдік: 24 Months Warranty from the date of purchase.
- Қолдау: Lifetime Support is provided for this product.
For any questions, technical assistance, or warranty claims, please contact GOLOZA customer service through your purchase platform or the official GOLOZA webсайт.