Кіріспе
This manual provides comprehensive instructions for the setup, operation, and maintenance of your Reloop RP-7000 MK2 Professional Upper Torque Turntable System. Please read this manual thoroughly before using the product to ensure proper functionality and longevity.
Қауіпсіздік нұсқаулары
- Ensure the turntable is placed on a stable, level surface away from direct sunlight, heat sources, and excessive moisture.
- Өрт немесе электр тогының соғуын болдырмау үшін құрылғыны жаңбырға немесе ылғалға ұшыратпаңыз.
- Тазалау немесе кез келген техникалық қызмет көрсетуді жүргізбес бұрын, қуат сымын әрқашан розеткадан ажыратыңыз.
- Құрылғыны өзіңіз жөндеуге тырыспаңыз. Барлық қызмет көрсетуді білікті қызмет көрсету қызметкерлеріне тапсырыңыз.
- Балалардың қолы жетпейтін жерде сақтаңыз.
Пакет мазмұны
Your Reloop RP-7000 MK2 Professional Upper Torque Turntable System package should include the following items:
- 2 x Reloop RP-7000 MK2 Professional Upper Torque Turntable System
- 2 x Reloop Dust Cover for RP-7000/8000
- Knox Gear Vinyl Record Care System (includes brush, velvet cleaner, stylus brush, and cleaning solution)
- Қуат кабельдері
- RCA кабельдері
- Қарсы салмақтар
- Slipmats
- Пайдаланушы нұсқаулығы

Image: The complete bundle including two Reloop RP-7000 MK2 turntables, two dust covers, and the Knox Gear vinyl record care solution.
Орнату
1. Қаптаманы ашу және орналастыру
Carefully remove all components from the packaging. Place the turntable on a flat, stable surface. Ensure there is adequate space around the unit for ventilation and cable connections.

Сурет: бұрышты view of the Reloop RP-7000 MK2 turntable, highlighting its main components.
2. Attaching the Dust Cover
Gently place the dust cover onto the turntable. The dust cover helps protect the platter and tonearm from dust and debris when the turntable is not in use.
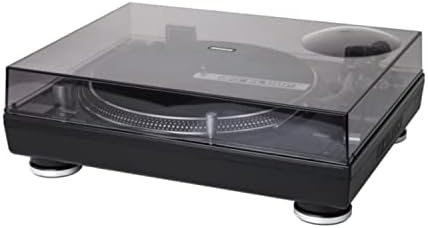
Image: The Reloop RP-7000 MK2 turntable with its protective dust cover in place.
3. Аудио кабельдерді қосу
Connect the RCA cables from the turntable's output to the appropriate input on your mixer or amplifier. Ensure the ground wire is also connected to prevent hum.

Image: Rear panel of the Reloop RP-7000 MK2, displaying the RCA audio outputs, ground terminal, and power connection.
4. Қуат қосылымы
Connect the power cable to the turntable and then to a suitable power outlet. Ensure the power switch is in the OFF position before connecting.
Пайдалану нұсқаулары
1. Қуатты қосу және өшіру
To power on the turntable, flip the power switch located on the front left side to the ON position. To power off, flip the switch back to OFF.

Сурет: үстіңгі жағы view of the Reloop RP-7000 MK2 turntable, illustrating the arrangement of its controls and components.
2. Жазбаны ойнату
- Жазбаны табаққа салыңыз.
- Select the appropriate speed (33, 45, or 78 RPM) using the speed buttons.
- түймесін басыңыз БАСТАУ/ТОҚТАТУ button to begin platter rotation.
- Carefully lower the tonearm onto the record using the cue lever.

Image: The Reloop RP-7000 MK2 turntable with a record playing, demonstrating the tonearm's position.
3. Pitch Control and Reverse Function
Use the pitch fader to adjust the playback speed. The КЕРІ button allows for reverse playback of the record.
Техникалық қызмет көрсету
1. Айналмалы табақшаны тазалау
Regularly wipe the turntable's surface with a soft, dry cloth. For the dust cover, use a slightly damp cloth and avoid abrasive cleaners. The included Knox Gear Vinyl Record Care System can be used for cleaning records and the stylus.

Image: The Knox Gear Vinyl Record Care System, showing the velvet record brush, stylus brush, and cleaning solution bottle.
2. Stylus Care
Gently clean the stylus using the provided stylus brush. Always brush from back to front. A dirty stylus can degrade sound quality and damage records.
Ақаулықтарды жою
| Мәселе | Ықтимал себебі | Шешім |
|---|---|---|
| Қуат жоқ | Қуат кабелі қосылмаған; Розетка ақаулы | Қуат кабелінің қосылымын тексеріңіз; Басқа розеткаға кіріп көріңіз |
| Дыбыс жоқ | RCA cables not connected; Amplifier/mixer input incorrect; Stylus damaged | Check RCA connections; Select correct input on amplifier/mixer; Inspect and replace stylus if necessary |
| Гыңылдаған шу | Ground wire not connected; Interference | Ensure ground wire is securely connected; Move turntable away from other electronic devices |
| Incorrect playback speed | Wrong speed selected; Pitch fader not centered | Select correct RPM; Adjust pitch fader to center position |
Техникалық сипаттамалар
- Бренд: Қайта айналдыру
- Үлгі: RP-7000 MK2
- Қосылу технологиясы: Сымды
- Арнайы мүмкіндіктер: Balanced S-shaped Tone Arm, Dual Start/Stop Buttons, Precise Motor Control, Reverse Function, Freely Movable Aluminum LED Target Light
- Материал: Пластмасса
- Элемент салмағы: 4.5 Kilograms (per turntable)
- Түсі: Deep black or classic silver metallic
- Үйлесімді құрылғылар: Динамик, құлаққап
Кепілдік және қолдау
Reloop products are designed and manufactured to the highest quality standards. For warranty information and technical support, please refer to the official Reloop webсайтына немесе жергілікті дистрибьюторға хабарласыңыз. Кепілдік шағымдары үшін сатып алуды растайтын құжатты сақтаңыз.
Қосымша көмек алу үшін мына сайтқа кіріңіз Reloop Store on Amazon.