1. Кіріспе
This manual provides essential instructions for the installation, operation, and maintenance of your Hikvision 8MP AcuSense WDR Mini Bullet Network Camera, model DS-2CD2083G2-IU. Please read this manual thoroughly before using the product and retain it for future reference.
Өнім аяқталдыview
The Hikvision DS-2CD2083G2-IU is a high-performance 8-megapixel (4K) network camera designed for advanced surveillance. It features AcuSense technology for accurate human and vehicle target classification, Wide Dynamic Range (WDR) for clear imaging against strong backlight, and a fixed 2.8mm lens for a wide field of view. Its IP67 rating ensures robust outdoor performance, and the integrated microphone allows for audio monitoring.
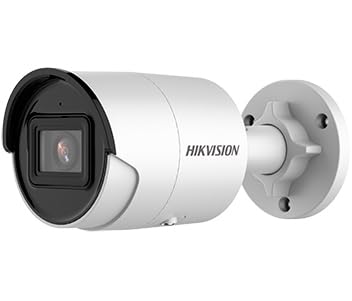
Figure 1: Hikvision 8MP AcuSense WDR Mini Bullet Network Camera (DS-2CD2083G2-IU)
This image displays the Hikvision 8MP AcuSense WDR Mini Bullet Network Camera, highlighting its compact bullet-style design suitable for various installation environments.
Негізгі мүмкіндіктер
- 8 Megapixel (4K) Resolution: Delivers high-quality, detailed video.
- AcuSense Technology: Reduces false alarms by accurately classifying human and vehicle targets.
- Кең динамикалық диапазон (WDR): Ensures clear images even in scenes with strong contrast.
- Fixed 2.8mm Lens: кең қамтамасыз етеді viewкіру бұрышы.
- Инфрақызыл (ИК) жарықтандыру: Night vision up to 40 meters.
- IP67 ауа райына төзімділік рейтингі: Әртүрлі ауа райы жағдайларында ашық ауада пайдалануға жарамды.
- Кірістірілген микрофон: Enables audio monitoring.
- Integrated Card Reader: Supports local storage (microSD card not included).
2. Қауіпсіздік туралы ақпарат
Жарақат немесе өнімге зақым келтірмеу үшін келесі қауіпсіздік шараларын орындаңыз:
- Ensure the power supply meets the camera's requirements (6.5 Watts).
- Камераны шамадан тыс температураға, ылғалдылыққа немесе коррозиялық ортаға ұшыратпаңыз.
- Avoid pointing the lens directly at strong light sources, as this may damage the sensor.
- Орнатуды білікті мамандар жергілікті электр ережелеріне сәйкес орындауы керек.
- Тек өндіруші көрсеткен аксессуарларды пайдаланыңыз.
- Камера линзасын жұмсақ, құрғақ шүберекпен тазалаңыз. Күшті химиялық заттардан аулақ болыңыз.
3. Орнату және орнату
3.1 Қаптаманы ашу
Carefully unpack the camera and check for any signs of damage. Ensure all components are present. (Typical components include: camera unit, mounting template, screws, waterproof connector, quick start guide).
3.2 Физикалық орнату
The camera is designed for ceiling mounting. Select a suitable location that provides the desired field of view and is within reach of network and power cables. Due to its IP67 rating, it is suitable for outdoor environments.
- Use the provided mounting template to mark drill holes on the ceiling.
- Drill the necessary holes and insert wall plugs if required.
- Secure the camera base to the mounting surface using the supplied screws.
- Оңтайлы қамту үшін камера бұрышын реттеңіз.
3.3 Желі және қуат қосылымы
This is an IP network camera. It requires a network connection and power. Power over Ethernet (PoE) is typically supported, simplifying installation by delivering both power and data over a single Ethernet cable. If PoE is not used, a separate 12V DC power adapter (not included) will be required.
- Connect an Ethernet cable from your network switch/router to the camera's RJ45 port. Use the waterproof connector for outdoor installations.
- If not using PoE, connect a 12V DC power adapter to the camera's power input.
- Once connected, the camera will power on. Allow a few minutes for it to boot up.
3.4 Бастапқы конфигурация
Камераға қол жеткізіңіз web арқылы интерфейс web browser using its default IP address (refer to the quick start guide or use Hikvision's SADP tool to discover the IP address). You will be prompted to set a strong password for security. Follow the on-screen instructions to configure network settings, date/time, and other basic parameters.
4. Пайдалану нұсқаулары
4.1 Тікелей View және Жазу
After initial setup, you can view the live feed from the camera through its web interface, a Network Video Recorder (NVR), or Hikvision's client software (e.g., iVMS-4200) or mobile app (Hik-Connect). Configure recording schedules and methods (continuous, motion-triggered) via the camera's settings or NVR.
4.2 AcuSense Smart Features
The AcuSense technology allows the camera to distinguish between humans, vehicles, and other moving objects, significantly reducing false alarms caused by animals, rain, or falling leaves. Configure these detection rules in the camera's event settings to receive more accurate alerts.
- Қозғалысты анықтау 2.0: Set up detection zones and sensitivity for human and vehicle events.
- Кіруді анықтау: Define virtual boundaries, and the camera will trigger an alarm if a human or vehicle crosses them.
- Сызықтың қиылысуын анықтау: Similar to intrusion, but for a specific line.
4.3 Wide Dynamic Range (WDR)
WDR compensates for extreme lighting conditions, such as strong backlight, to ensure that both bright and dark areas of the image are clearly visible. This feature is typically enabled by default but can be adjusted in the image settings.
4.4 Infrared (IR) Night Vision
The camera automatically switches to IR mode in low-light conditions, providing clear black-and-white video up to 40 meters. Ensure no obstructions block the IR LEDs for optimal night vision performance.
4.5 Дыбыс мониторингі
With its built-in microphone, the camera can capture audio from the surveillance area. Audio settings, including gain control, can be configured in the camera's web interface. Ensure local regulations regarding audio recording are followed.
5. Техникалық қызмет көрсету
- Тазалау: Камера линзасын және корпусын үнемі жұмсақ, d шүберекпен тазалап тұрыңызamp мата. Абразивті тазартқыштарды қолданбаңыз.
- Микробағдарламаны жаңарту: Hikvision ресми өкілін мезгіл-мезгіл тексеріп отырыңыз website for firmware updates. Keeping the firmware updated ensures optimal performance, new features, and security enhancements.
- Кабельді тексеру: For outdoor installations, periodically inspect cables and connections for wear or damage, especially the waterproof connectors.
- Құпия сөзді басқару: Regularly change your camera's password to maintain security.
6. Ақаулықтарды жою
| Мәселе | Ықтимал себебі | Шешім |
|---|---|---|
| No image/camera offline | No power, network cable disconnected, incorrect IP address. | Check power supply and network cable. Verify IP address using SADP tool. Restart camera. |
| Суреттің сапасы нашар | Dirty lens, incorrect focus (if adjustable), poor lighting, network bandwidth issues. | Clean the lens. Ensure adequate lighting. Check network connection speed. Adjust image settings (WDR, exposure). |
| False alarms from motion detection | Sensitivity too high, environmental factors (trees, animals), AcuSense not configured. | Adjust motion detection sensitivity. Configure AcuSense human/vehicle detection. Adjust detection zones. |
| Қол жеткізу мүмкін емес web интерфейс | Қате IP мекенжайы, желіге қосылу мәселесі, браузердің үйлесімділігі. | Verify IP address. Ensure camera and PC are on the same network segment. Try a different browser. |
If the problem persists after attempting these solutions, please contact Hikvision technical support.
7. Техникалық сипаттамалар
| Ерекшелік | Мәлімет |
|---|---|
| Үлгі нөмірі | DS-2CD2083G2-IU |
| Кескін сенсоры | CMOS |
| Макс. Ажыратымдылық | 8 МП (4 К) |
| Объектив | 2.8 мм бекітілген линза |
| IR диапазоны | 40 метрге дейін |
| WDR | Қолдау көрсетіледі |
| AcuSense | Human and Vehicle Target Classification |
| Аудио | Кірістірілген микрофон |
| Жергілікті сақтау | Integrated Card Reader (MicroSD slot) |
| Ауа райына төзімділік рейтингі | IP67 |
| Қуатты тұтыну | 6.5 Вт |
| Өлшемдері (L x W x H) | 15 x 15 x 8 см (шамамен) |
| Монтаждау түрі | Төбеге орнату |
| Ескерту түрі | Motion Only (configurable for human/vehicle) |
8. Кепілдік және қолдау
Hikvision products typically come with a limited manufacturer's warranty. Please refer to the warranty card included with your product or visit the official Hikvision webаймағыңызға тән егжей-тегжейлі кепілдік талаптары мен шарттарын алуға болатын сайт.
For technical support, firmware downloads, or further assistance, please visit the official Hikvision support portal or contact their customer service department. Ensure you have your product model number (DS-2CD2083G2-IU) and serial number ready when contacting support.
Official Hikvision Webсайт: www.hikvision.com