
Lorex ACSOL2B
U471AA 2K сымсыз камераларға арналған Lorex күн панелі пайдаланушы нұсқаулығы
Model: ACSOL2B
Кіріспе
This manual provides comprehensive instructions for the installation, operation, and maintenance of your Lorex Solar Panel, designed exclusively for U471AA 2K Wire-Free cameras. This solar panel offers an environmentally-friendly solution to continuously power your camera, extending battery life and ensuring uninterrupted surveillance.
Қауіпсіздік туралы ақпарат
- Ensure all connections are secure and waterproof to prevent damage from moisture.
- Do not attempt to disassemble or modify the solar panel. This may void the warranty and cause damage.
- Install the solar panel in a location where it is not easily accessible to unauthorized individuals.
- Avoid placing the solar panel near flammable materials or in areas with extreme temperatures outside its operating range.
- Use only the provided mounting hardware to ensure secure installation.
Пакет мазмұны
Пакетте барлық элементтердің бар екенін тексеріңіз:
- Lorex Solar Panel (Model: ACSOL2B)
- Бекіту кронштейні
- Бекіту бұрандалары мен қабырға тығындары
- USB Charging Cable (integrated with solar panel)
Өнім аяқталдыview
The Lorex Solar Panel is designed to provide continuous power to your compatible Lorex U471AA 2K Wire-Free cameras. It features a durable, weather-resistant design suitable for outdoor use.

1-сурет: Алдыңғы view of the Lorex Solar Panel, showing the photovoltaic cells and the integrated mounting base.

2-сурет: Бұрыштық view of the Lorex Solar Panel, highlighting the adjustable mounting bracket for versatile positioning.
- Photovoltaic Cells: Convert sunlight into electrical energy.
- Бекіту кронштейні: Икемді орналастыру және бұрышты реттеуге мүмкіндік береді.
- USB зарядтау кабелі: Connects the solar panel to the camera.
- Жарық диодты индикатор: Provides status information (e.g., charging status).
- IP66 рейтингі: Ensures the panel is weather-resistant against dust and powerful water jets.
Орнату
1. Орнату орнын таңдау
Optimal performance of the solar panel depends on its placement. Select a location that receives direct sunlight for the majority of the day, ideally 4-6 hours of direct sunlight. Avoid areas with significant shade from trees, buildings, or other obstructions.
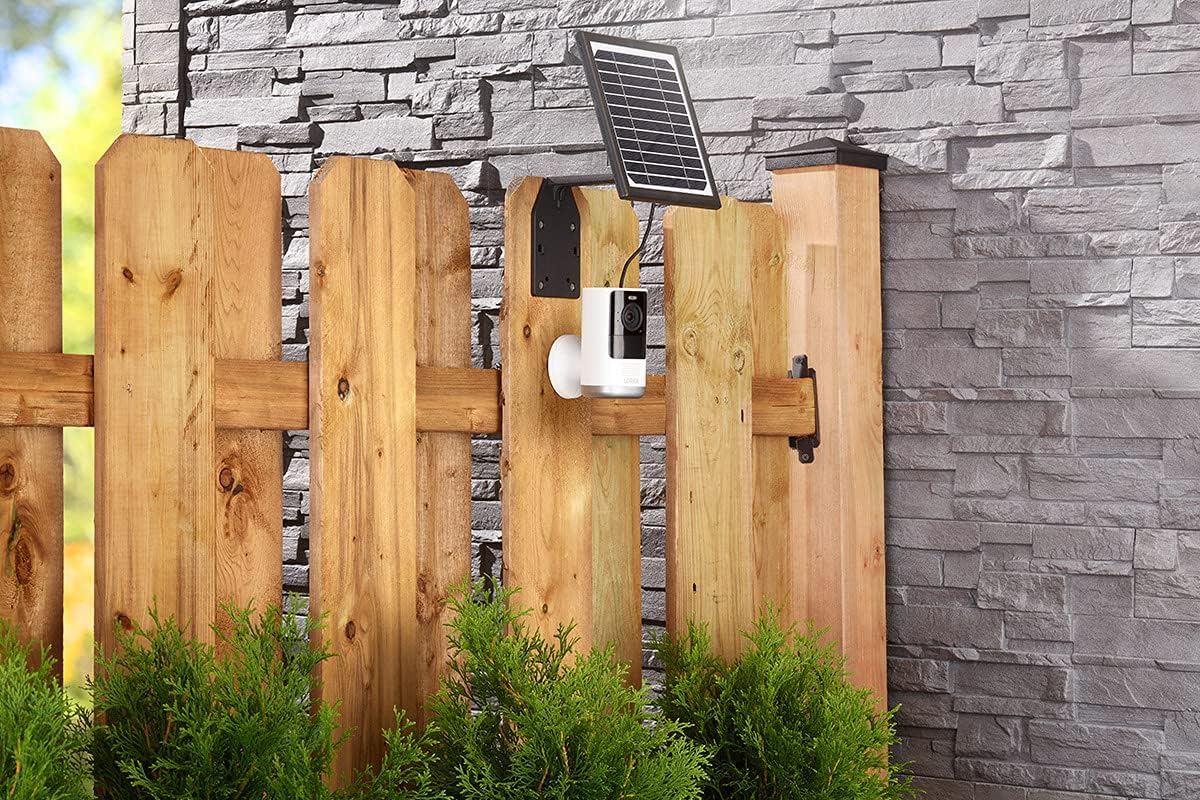
3-сурет: Example installation on a wooden fence, demonstrating outdoor placement.

4-сурет: Example installation on a stone wall, showing a common mounting surface.
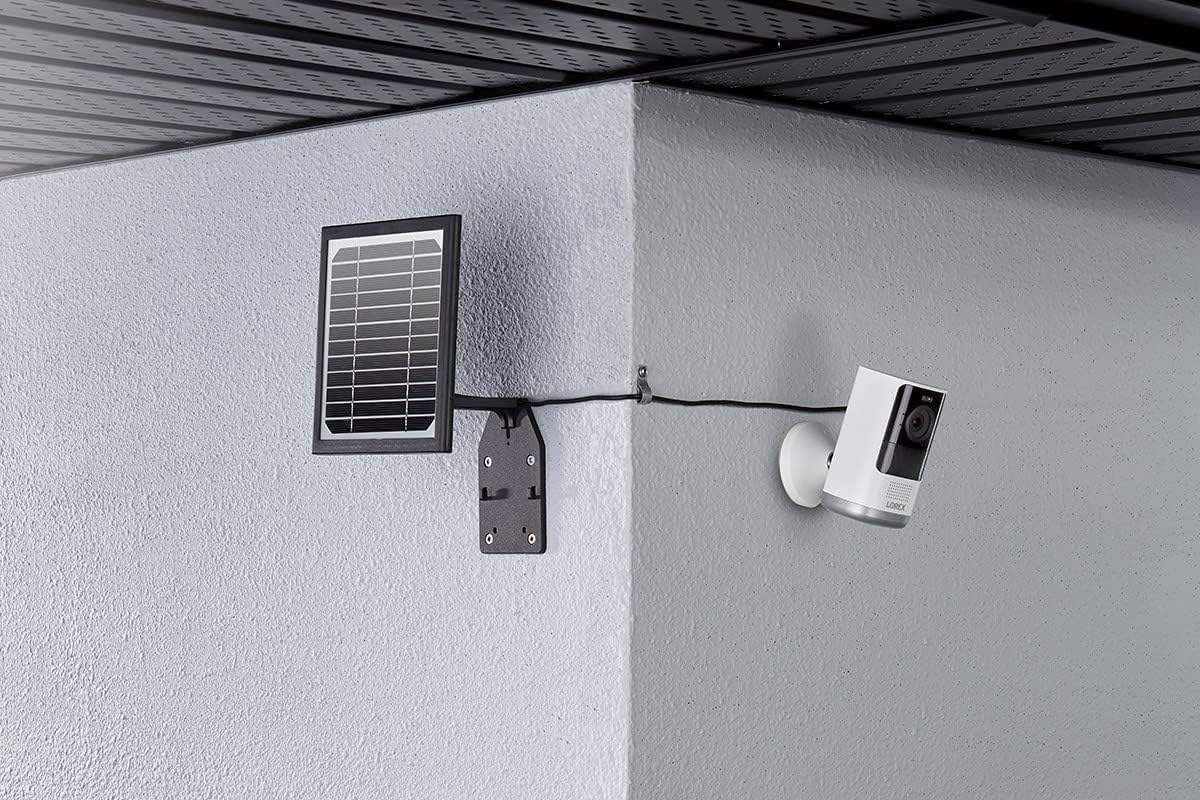
5-сурет: Example installation in a corner, illustrating flexible mounting options.
2. Mounting the Solar Panel
- Position the mounting bracket against the chosen surface. Use a pencil to mark the drill holes.
- Drill pilot holes at the marked locations. If mounting on masonry or stucco, insert the wall plugs.
- Берілген бұрандаларды пайдаланып, бекіту кронштейнін бетіне бекітіңіз.
- Attach the solar panel to the mounting bracket. Adjust the angle of the solar panel to maximize sun exposure. The panel should face the direction that receives the most direct sunlight throughout the day.
3. Камераға қосылу
The solar panel comes with an integrated USB charging cable. Connect this cable to the charging port on your Lorex U471AA 2K Wire-Free camera.

6-сурет: Бүйір view illustrating the connection of the solar panel to the camera via the charging cable.
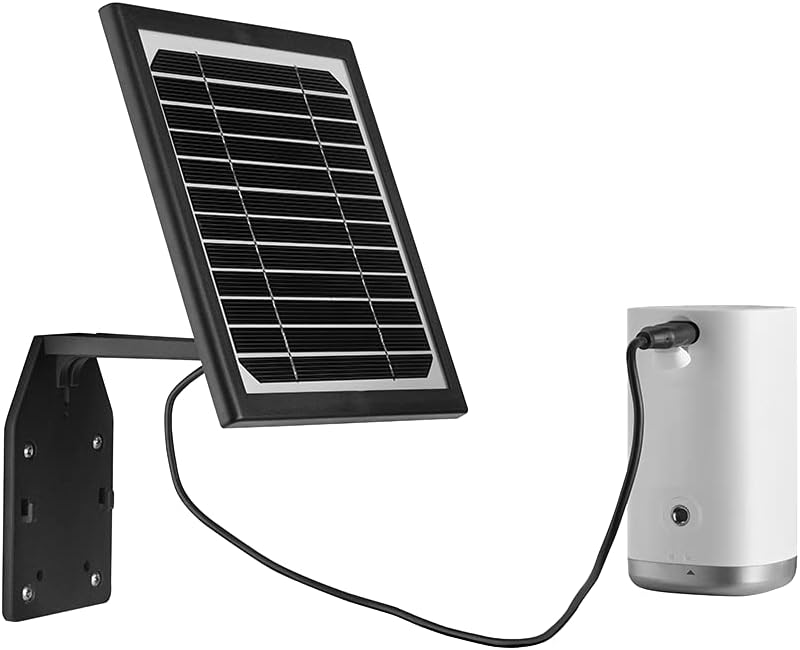
7-сурет: Алдыңғы view of the solar panel connected to the camera, showing the cable routing.
Ensure the connection is snug to maintain weather resistance. Once connected, the solar panel will begin charging the camera's battery when exposed to sufficient sunlight. The LED indicator on the solar panel will illuminate to confirm charging status.
Жұмыс істеп тұр
The Lorex Solar Panel operates automatically. When exposed to sunlight, it converts solar energy into electrical energy, which is then used to charge the connected U471AA 2K Wire-Free camera's internal battery. The panel is designed to provide a trickle charge, maintaining the camera's battery level and reducing the need for manual recharging.
- Зарядтау көрсеткіші: Refer to your camera's user manual for specific battery status indicators. The solar panel itself may have an LED that indicates charging activity.
- Энергия тиімділігі: The panel is designed for high efficiency, even in less than ideal sunlight conditions, though direct sunlight is always preferred for optimal performance.
Техникалық қызмет көрсету
Regular maintenance ensures the longevity and efficiency of your solar panel.
- Тазалау: Күн батареясының бетін мезгіл-мезгіл жұмсақ, d шүберекпен тазалап тұрыңызamp cloth to remove dust, dirt, or debris that may accumulate and reduce efficiency. Do not use abrasive cleaners or harsh chemicals.
- Кедергілерді тексеру: Regularly check for any new obstructions (e.g., growing tree branches, new constructions) that might cast shadows on the panel and reduce its sun exposure.
- Кабельді тексеру: Inspect the charging cable and connections for any signs of wear, damage, or corrosion. Ensure the connection to the camera remains secure and waterproof.
- Монтаждау қауіпсіздігі: Periodically check that the mounting screws and bracket are still securely fastened, especially after strong winds or storms.
Ақаулықтарды жою
| Мәселе | Ықтимал себебі | Шешім |
|---|---|---|
| Camera battery not charging. | Күн сәулесі жеткіліксіз. Panel surface is dirty. Кабель қосылымы бос немесе зақымдалған. Camera battery issue. | Relocate panel to an area with more direct sunlight. Панельдің бетін тазалаңыз. Check and secure the USB cable connection. Inspect for damage. Test camera with a standard USB charger to rule out camera battery issues. |
| Solar panel LED not illuminating. | No sunlight. Panel is faulty. Cable not connected. | Ensure panel is exposed to direct sunlight. Contact Lorex support if problem persists after ensuring sunlight and connection. Verify the USB cable is securely connected to the camera. |
| Panel appears damaged after installation. | Орнату дұрыс емес. Environmental factors (e.g., severe weather). | Review installation steps to ensure correct mounting. Contact Lorex support for assistance if damage is significant. |
Техникалық сипаттамалар
- Бренд: Лорекс
- Модель нөмірі: ACSOL2B
- Материал: Кремний
- Тиімділігі: Жоғары тиімділік
- Қосқыш түрі: USB
- Максималды қуат: 3 Вт
- Элемент салмағы: 1.45 фунт
- Пакет өлшемдері: 8.78 x 7.32 x 3.82 дюйм
- IP рейтингі: IP66 (ауа райына төзімді)
- Үйлесімділік: Lorex U471AA 2K Wire-Free Cameras
Кепілдік және қолдау
For warranty information and technical support, please refer to the official Lorex website or contact Lorex customer service directly. Keep your purchase receipt as proof of purchase for warranty claims.
Lorex Support: www.lorex.com/support
Ask a question about this manual
Ask about setup, troubleshooting, compatibility, parts, safety, or missing instructions. Manuals+ will review the question and use this page’s manual context to help answer it.